F100 Restomod · Guide Library · Bumpside
1967–1972 Ford F-100 — Bumpside
Fits · 1967–1972 only — this IS the generation guideThe flagship generation — and this site’s home turf. Drop beams, Crown Vic swaps, axle flips, and every motor from a Windsor to a Coyote, with the prices and cautions checked line by line (including two corrections to earlier drafts, noted where they land).
About This Guide
Build philosophy: Get the stance right, improve steering and brakes, and keep the original truck’s character. A great street truck does not require a Coyote swap or an expensive custom chassis.
What this guide covers:
- Best-value modifications ranked by priority
- Twin I-Beam lowering, Crown Victoria suspension, axle flip, and rear lowering options
- Rear axle and engine swap comparisons
- Wheel and tire fitment considerations
- A sample DIY budget and recommended build sequence
Cost estimates are approximate U.S. dollar planning ranges, not live quotes. They vary with condition, parts availability, shipping, fabrication, and the amount of labor performed at home. The options in this guide primarily apply to 2WD trucks — a 4WD truck has a different front suspension and requires a different plan.
Best Modifications, Ranked by Value
1 · Front lowering beams or a purpose-built drop setup
Planning cost: $850–$1,050 for beams; roughly $650–$1,200 for a broader front refresh.
Retains the factory-style Twin I-Beam layout and avoids major frame fabrication. Confirm application-specific fitment, steering geometry, shock travel, and alignment requirements.
2 · Rear lowering setup
Planning cost: $150–$500 for basic parts; more if clearance work is needed.
An axle flip can produce a substantial drop. Check bump travel, frame clearance, pinion angle, driveshaft clearance, brake hoses, and shock travel.
3 · Steering and suspension refresh
Planning cost: $250–$800 in parts, depending on what is worn.
Inspect kingpins and bushings, tie rods, shocks, and other year-specific components. Repair worn parts before lowering to reduce wandering, bump-steer, and uneven tire wear.
4 · Wheels and tires
Planning cost: $600–$1,400 for a basic package.
Wheel diameter, width, offset/backspacing, tire size, brake clearance, and full-lock fender clearance must all be checked.
5 · Brake upgrade or refresh
Planning cost: $300–$1,200 depending on repairs versus conversion.
Inspect the current system and consider a compatible front-disc conversion if the truck has drum brakes. Match the master cylinder, proportioning, and rear brakes to the full setup.
Suspension Choices for a 1967–1972 F-100
A · Drop beams — retain the original suspension
Approximate cost: $850–$1,050 for beams; allow about $650–$1,200 for a broader front refresh.
Purpose-built lowering beams reduce ride height while retaining the original Twin I-Beam layout. Compatible tie-rod relocation parts, shocks, and alignment work may be needed.
Pros: Relatively straightforward, preserves original character, and avoids major frame fabrication. Cons: Keeps the original suspension architecture; steering geometry and tire clearance still matter.
B · Lowering springs and shocks
Approximate cost: $200–$600 in parts.
This can be a less invasive option where a correct, application-specific setup is available. Confirm the actual drop and remaining suspension travel for the exact truck. Ordinary replacement springs are not necessarily lowering springs.
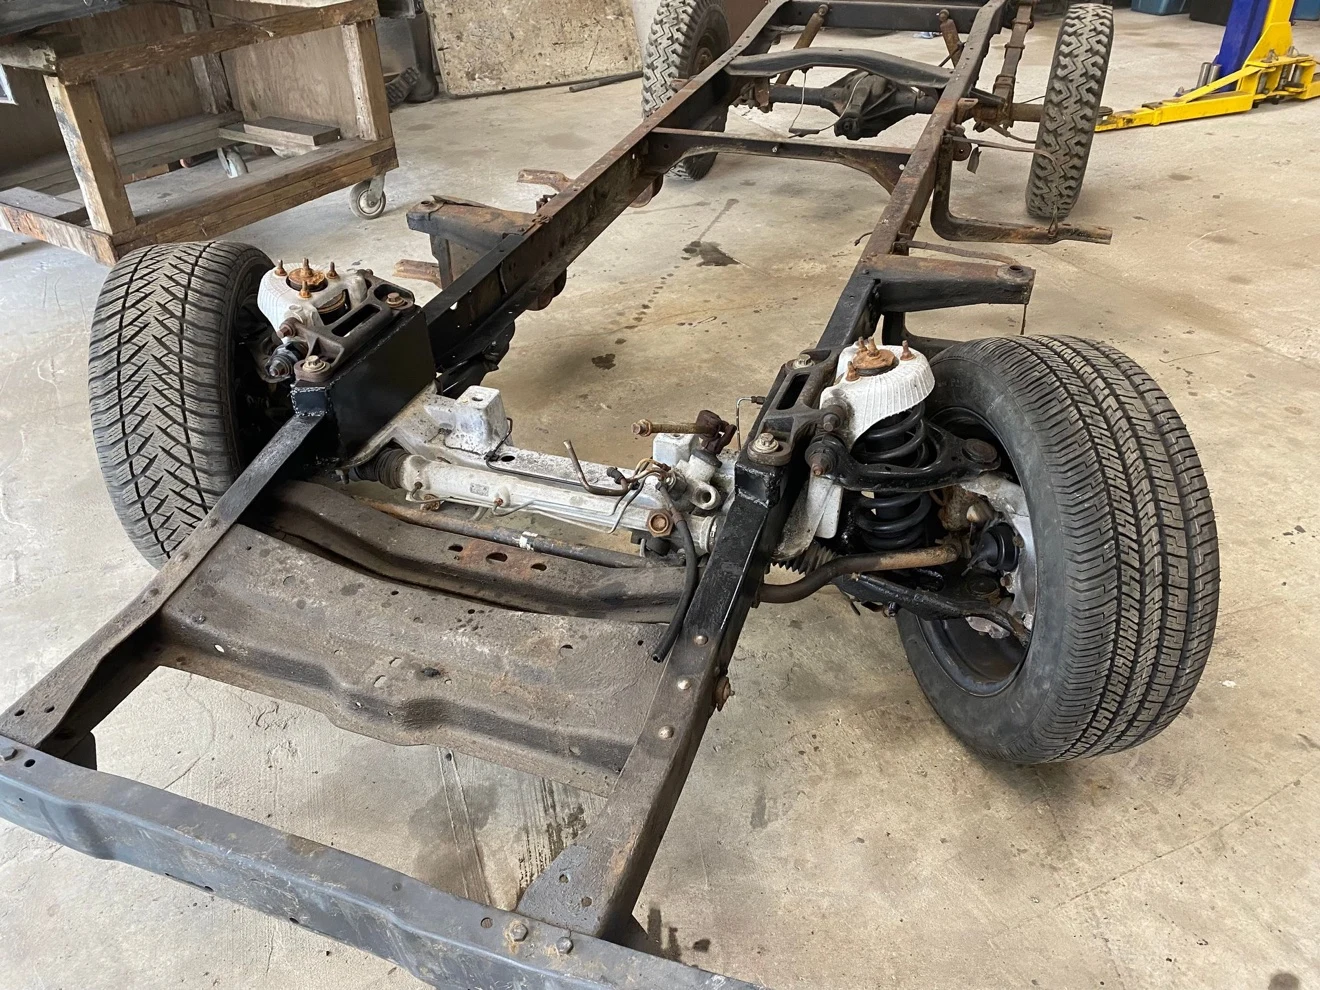
C · Crown Victoria front suspension swap
Potential donor: 2003–2011 Ford Crown Victoria, Mercury Grand Marquis, or Lincoln Town Car. Approximate DIY cost: $1,200–$3,000, depending on donor condition and fabrication.
A donor front assembly can provide independent front suspension, rack-and-pinion steering, coil springs, and front disc brakes. It is not a simple bolt-in swap: plan for frame reinforcement and custom mounting, steering-column connections, brake plumbing, wheel fitment, and alignment.
Pros: Modernized steering and suspension in one project; suits a lowered street-truck build. Cons: Fabrication and engineering are substantial; track width, ride height, steering geometry, and wheel bolt pattern need careful planning.
D · Rear axle flip
Approximate cost: $150–$500 for basic parts; potentially $400–$1,000 with clearance and supporting work.
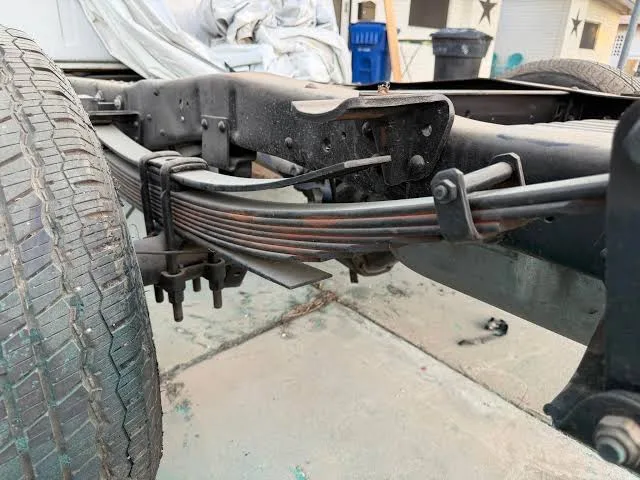
Relocating the rear axle relative to the leaf springs can produce a dramatic drop; a traditional flip may lower the rear by roughly five inches, depending on the setup.
Pros: Large stance change for relatively little money. Cons: A frame C-notch or other clearance solution may be required. Check bump travel, brake hoses, shock travel, and driveshaft angles. Never heat leaf springs to lower them.
 Before · stock
 After · flipped
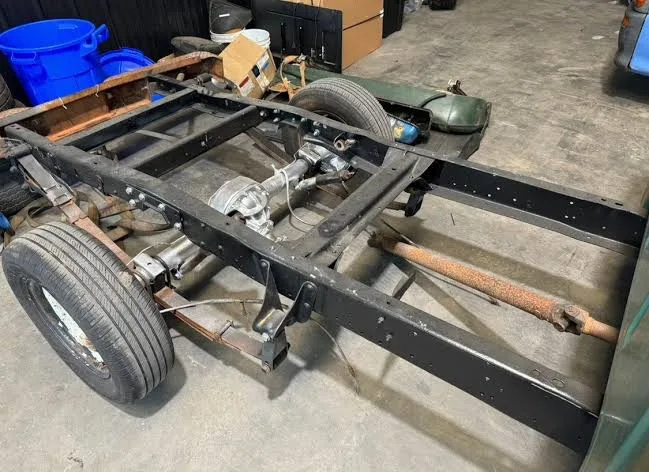
The same job, on our own truck. Left: the Project ’72’s factory rear, up close — the pack riding over the axle, U-bolts strapped over the top of the springs, exactly as Ford shipped it. Right: the flip done — the axle sitting on top of the pack on the painted frame. Real photos, our frame, our hands.
E · Rear lowering springs or blocks
Approximate cost: $100–$350 for blocks; $250–$600 for replacement lowering springs.
A less aggressive alternative to an axle flip. Depending on the parts, a drop of roughly two to three inches may be possible. Use engineered components and verify pinion angle, U-bolt engagement, and axle control.
Complete Crown Victoria chassis swap
This is different from installing only the Crown Vic front suspension. A complete 2003–2011 donor chassis may provide modern front and rear suspension, steering, and brakes, but body mounts, wheelbase, track width, drivetrain, steering, and brake integration must be engineered. A similar wheelbase does not make the F-100 body a direct bolt-on.
Budget recommendation: Keep the original F-100 frame unless it is damaged or you deliberately want a comprehensive restomod.
Rear Axle and Driveline Swaps
| Option | Approx. DIY parts cost | Key considerations |
|---|---|---|
| Rebuild existing rear axle | $250–$800 | Often cheapest if housing and gears are usable. |
| Ford 9-inch rear axle | $400–$1,200 used; more rebuilt | Check width, gear ratio, brakes, bolt pattern, and condition. |
| Ford Explorer 8.8 axle | $200–$600 used; more installed | Verify width, spring perches, pinion angle, and brake setup. |
| Limited-slip differential | $300–$800+ | Match gears and carrier to the specific axle. |
| Custom driveshaft | $250–$600 | Measure after engine, transmission, and axle positions are final. |
A cheap donor axle can become expensive if it needs bearings, gears, brakes, or fabrication. Keep the original axle if it is healthy and appropriate for the intended power; otherwise compare a correctly sized Ford 9-inch with an Explorer 8.8 before buying.
Engine Swaps: Budget to High-End
| Engine / route | Approx. DIY parts cost | Pros & compatibility notes |
|---|---|---|
| 302 / 5.0L Windsor | $1,000–$3,500 for used engine and basic conversion parts | Traditional Ford V8 and broad parts availability. Check mounts, oil pan, accessories, transmission, cooling, and exhaust. EFI adds wiring and fuel-system work. |
| 351 Windsor | $1,500–$4,000 for used engine and basic parts | More displacement and torque. Verify oil-pan clearance, mounts, exhaust, cooling, and component compatibility; not every 302 part interchanges. |
| 4.6L Modular V8 | $1,500–$4,000 for engine, transmission, and basic parts | A complete Crown Vic/Grand Marquis donor may supply related components. Wiring, transmission controls, mounts, oil pan, exhaust, and driveshaft need planning. |
| 5.0L Coyote | $10,000–$18,000+ for a DIY parts build | Modern power and fuel injection, but electronics, transmission, fuel delivery, cooling, headers, and driveshaft raise costs significantly. |
Costs above are broad planning estimates, not complete installed quotes. A running donor, included accessories, and a compatible transmission can change the total considerably.
Budget tip: If the existing engine runs well, prioritize suspension, steering, brakes, and tires before replacing it. A healthy original six-cylinder or V8 can make an enjoyable lowered cruiser.
Wheels, Tires, and Stance
Three looks that suit a street truck:
- Old-school muscle truck: 15- or 16-inch classic wheels, moderate tire sidewall, and a mild drop.
- Pro-touring: 17- or 18-inch wheels, modern tires, firmer suspension, and upgraded brakes.
- Patina cruiser: Original weathered paint, understated wheels, a mild drop, and a clean interior.
Planning cost: About $600–$1,400 for a basic wheel-and-tire package; premium and larger setups cost more.
Important bolt-pattern note: The stock half-ton F-100 commonly uses a 5-on-5.5-inch pattern, while Crown Victoria front hubs use 5-on-4.5-inch. If combining Crown Vic front suspension with the original rear axle, plan for compatible front and rear wheels or an engineered axle/hub solution. Wheel diameter, offset, brake clearance, and full-travel tire clearance must be verified for the actual parts.
Example DIY Budget
| Item | Planning budget |
|---|---|
| Front drop beams and compatible hardware | $850–$1,050 |
| Rear lowering setup | $200–$500 |
| Steering and suspension refresh | $250–$600 |
| Shocks and supporting hardware | $150–$300 |
| Used or budget wheels and tires | $600–$1,000 |
| Brake repairs or upgrade allowance | $300–$800 |
| Alignment and miscellaneous supplies | $150–$300 |
| Estimated total | $2,500–$4,550 |
This is a planning budget, not a guaranteed all-in price. It assumes a usable frame, a running engine and transmission, and substantial DIY labor. A complete disc-brake conversion, frame notch, unexpected rust repairs, or professional welding can increase the total. The total reflects the corrected drop-beam price (see the note in the ranked list above).
Build Order
Recommended build sequence
- 1 · Inspect the truck. Check frame condition, steering-box mounts, suspension wear, brakes, rust, and the engine/transmission condition.
- 2 · Choose the target ride height. Decide between a mild two- to three-inch drop and a more aggressive five-inch-plus rear drop.
- 3 · Plan front and rear together. Confirm how front and rear ride heights will work together before purchasing lowering parts.
- 4 · Refresh steering, suspension, and brakes. Replace worn components and ensure the parts are compatible with the chosen ride height.
- 5 · Select wheels and tires. Confirm bolt pattern, width, backspacing, brake clearance, and tire clearance at full steering lock and suspension travel.
- 6 · Align and road-test. Check steering geometry, brake balance, bump travel, and driveline angles before regular driving.
Recommended starting build
For a budget-minded 1967–1972 F-100 street truck, start with the original frame, a moderate front drop, a carefully planned rear lowering setup, refreshed steering, good brakes, and classic wheels. Consider a Crown Victoria front suspension swap only if you are prepared for fabrication or have a trusted fabricator.
Use rated jack stands; never work under a truck supported only by a jack. Structural welding and critical suspension mounts should be completed or inspected by a qualified fabricator. Brake and steering modifications must be properly engineered and tested before road use.
Parts list — shop this generation’s build
Built from this guide’s own sections. Links are marked affiliate slots until each retailer program approves F100 Restomod — hard parts route to CJ Creators / JEGS, tools and consumables to Amazon, donor and used parts to eBay Partner Network. Fat Fender Garage and QA1 run no affiliate programs, so they appear as name-only mentions.
- DJM Dream Beams, 1965–79 (kingpin design) — JEGS · CJ CreatorsAffiliate slot
- Kingpin & bushing kit (beam refresh) — JEGSAffiliate slot
- Rear flip kit + C-notch plates — JEGS · CJ CreatorsAffiliate slot
- Drop shocks, front & rear — JEGS · CJ CreatorsAffiliate slot
- Ford 9-inch swap hardware — perches, U-bolts — JEGSAffiliate slot
- Explorer 8.8 rear axle (donor) — eBay Partner NetworkAffiliate slot
- Crown Victoria front clip, 2003–11 (donor) — eBay Partner NetworkAffiliate slot
- 5×4.5″ wheels to match a Crown Vic front — JEGS · CJ CreatorsAffiliate slot
- QA1 bolt-in coilover conversion — name-only mention (no affiliate program; stocked by the retailers above)
- Fat Fender Garage chassis & parts — name-only mention (no affiliate program; stocked by the retailers above)
Two routes, like the rest of the site: new beams from the catalog, or a yard Crown Vic clip off eBay — the guide’s bolt-pattern section explains why the wheels have to match whichever front you choose.
Reference Notes
This guide consolidates the planning ranges and compatibility cautions from the F100 Restomod research. Confirm year-specific fitment and current part pricing with the manufacturer or supplier before purchase. Estimates exclude taxes, shipping, and most professional labor.
- F-100 generation history and Twin I-Beam timing: supermotors.net/registry/ford/f-100
- 1961–1966 chassis, unibody, and engine overview: supermotors.net/registry/ford/f-100/1961-1966
- 1953–1956 Mustang II crossmember instructions: static.speedwaymotors.com/pdf/910-34425.pdf
- 1953–1956 rear axle/lowering discussion: ford-trucks.com — 1953–1956 F100 rear end selection
- 1965–1979 IFS / Twin I-Beam overview: Classic Truck Performance, July 2024