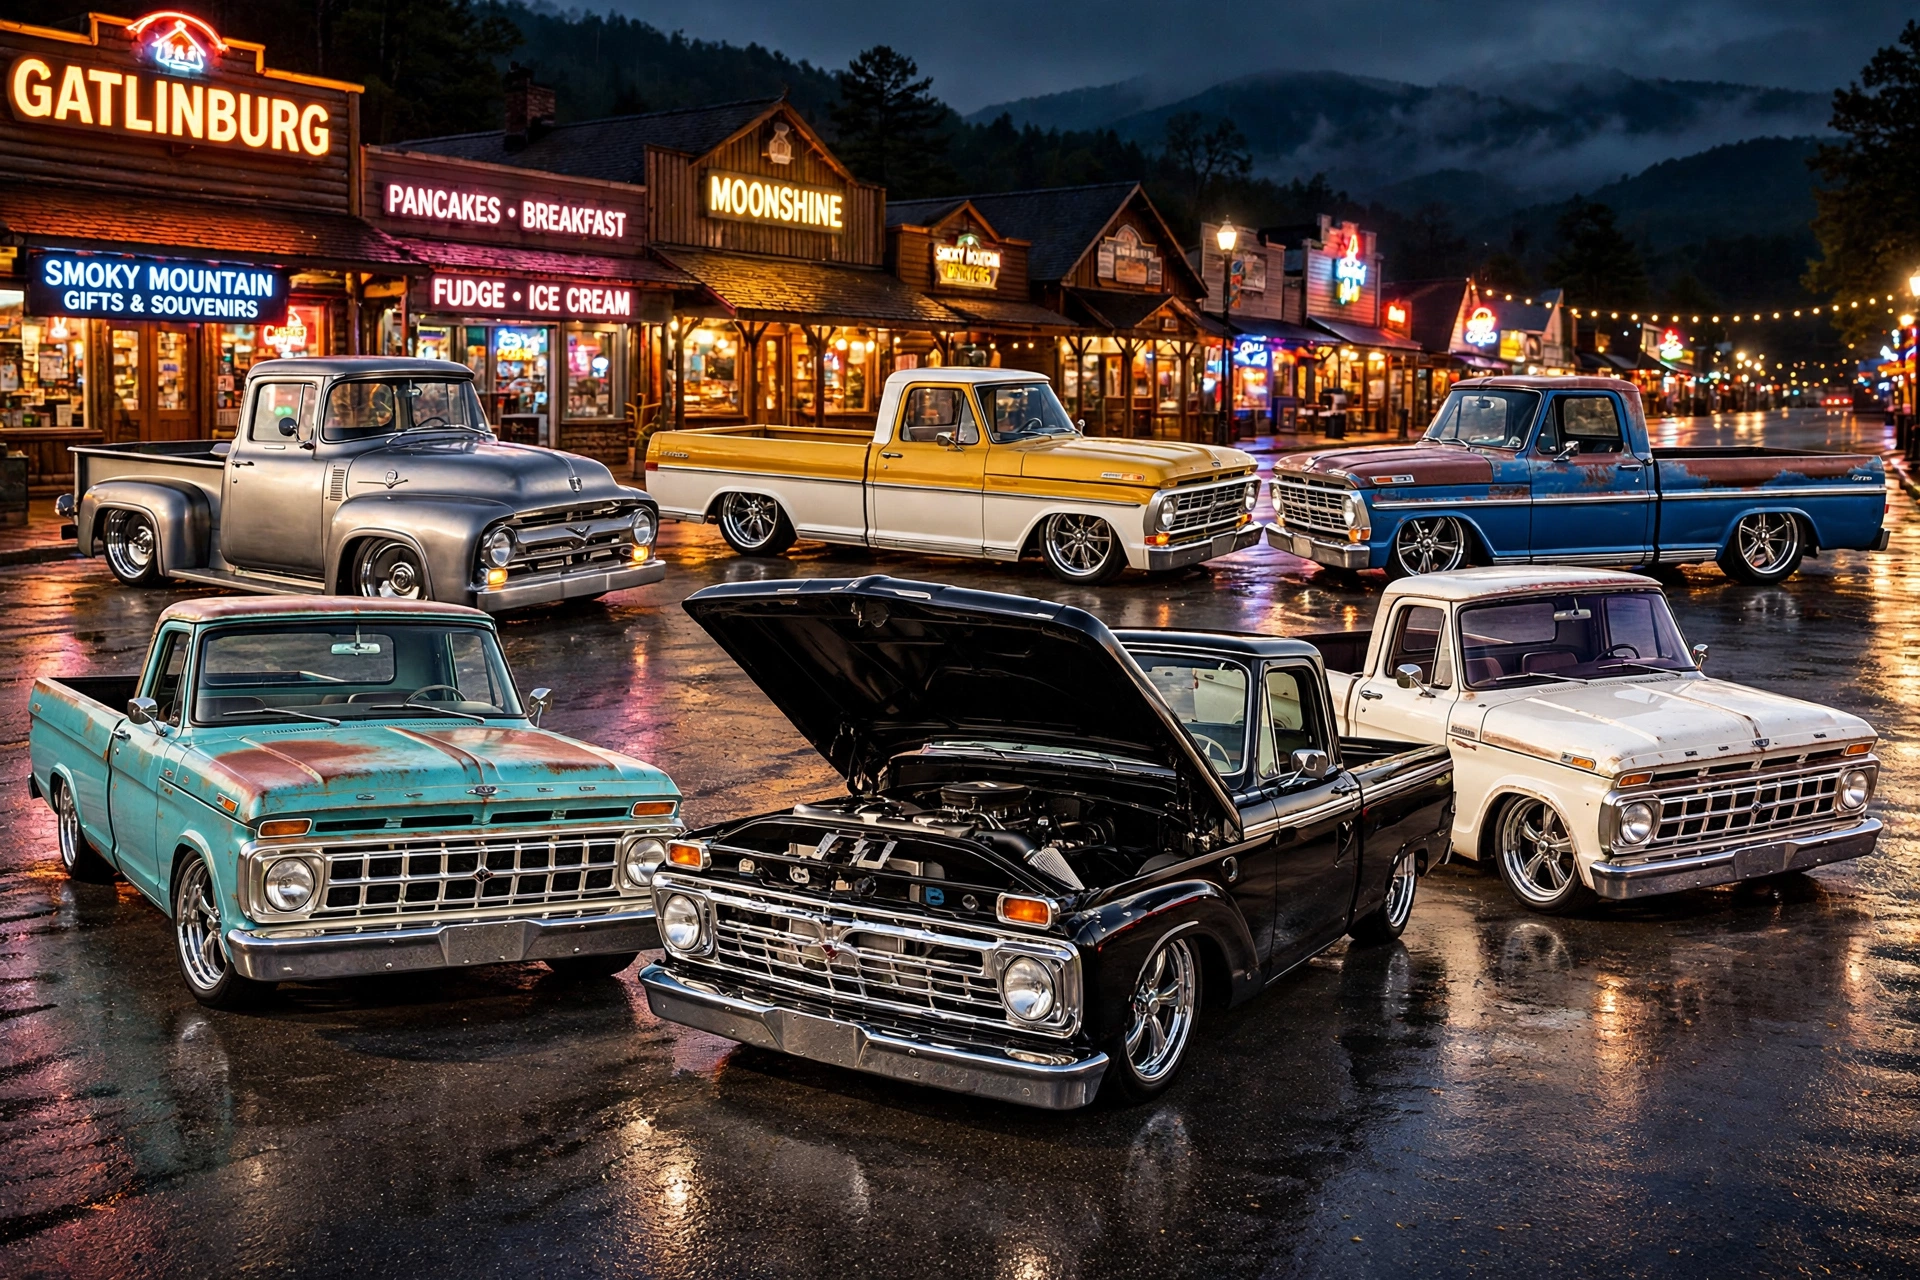
Six lowered Ford F-100 restomods in two rows on the wet Gatlinburg Parkway at night — turquoise patina slickside down front beside a black bumpside with its hood up showing the motor, neon motel and shop signs glowing behind a silver ’56, a yellow-and-white two-tone and a blue patina bumpside

What’s Your Truck?

Showing every job for every F-100. Pick your years and we’ll narrow it to your truck.

The Common Jobs · Every Generation

WHAT CAN I DO TO MY TRUCK — AND FOR WHAT BUDGET?

You already know your truck — so here’s what owners actually do to them, and what it costs. Every job shows its ballpark two ways, right on the block: Buy new or the junkyard route — that’s the budget choice. Tap a job and it opens with what it is, what you need, the average cost, and both ways to do it. Picked your truck up top? Jobs that fit your years stay lit up — the rest grey out and tell you why. Fat shops sell you a whole chassis; here you pull a donor, turn your own wrenches, and keep the change.


Turquoise bumpside F-100 with hood open showing a clean modern 5.0 Coyote engine swap
Flagship Motor · 5.0 Coyote

Coyote Swaps

Fits · All six generations — mounts vary by generation

Year check: the swap itself is generation-agnostic, the hardware isn’t. Mount kits, headers and oil-pan clearance are cut per generation — the deepest catalog support runs ’65–’79, the ’53–’60 bays are the tightest (steering and pan clearance need measuring), and Bullnose swaps lean on a younger but growing kit market.

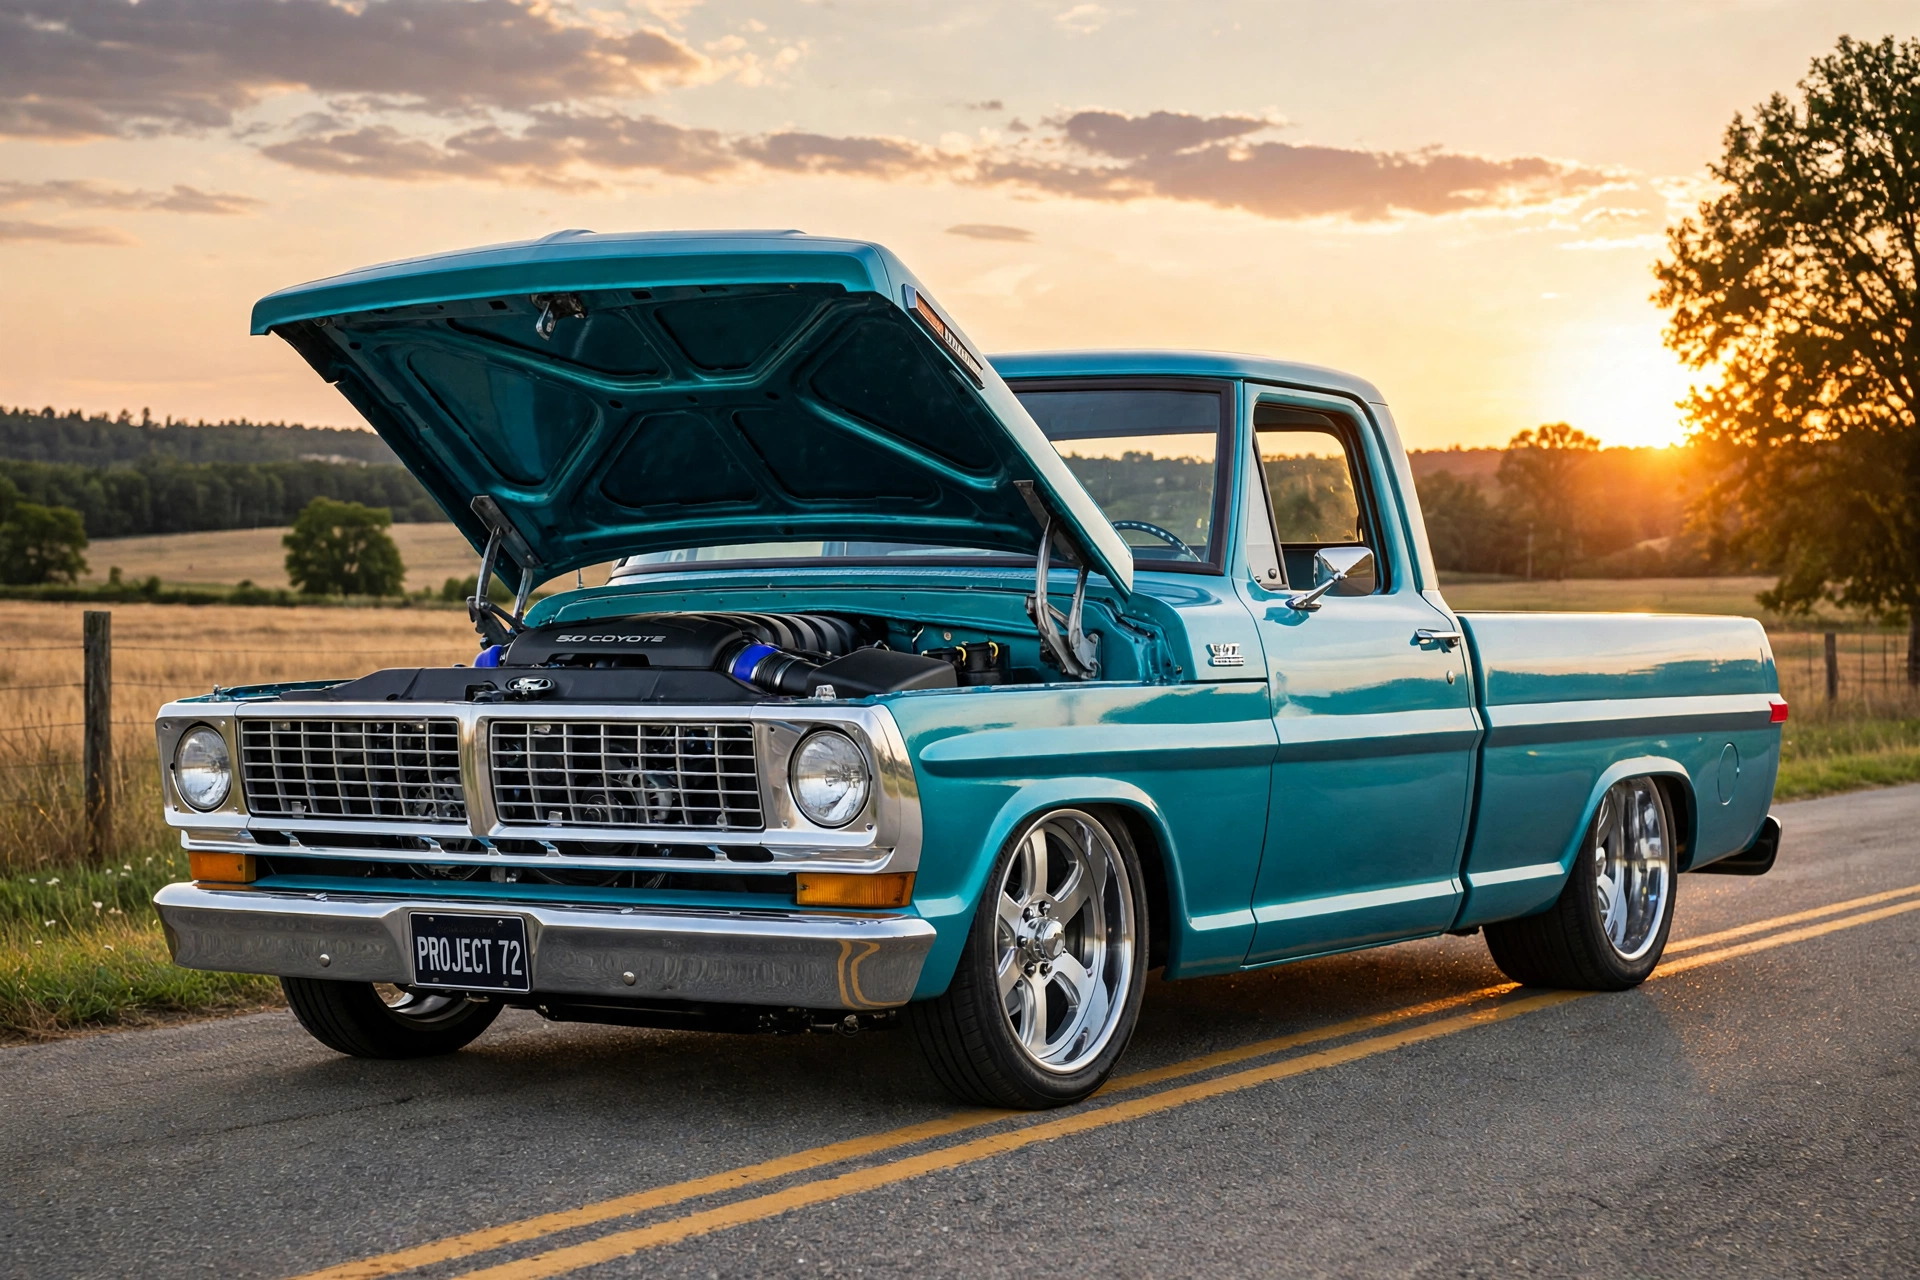
The flagship motor move: a modern 5.0L Coyote — 360 to 460+ hp stock, factory reliability, overdrive automatics — in a bumpside bay. No blower, no stacks: just the clean modern swap in the hero truck above. It pairs perfectly with a Crown Vic front end (same-era steering, brakes, and wheel pattern thinking) and turns a ’72 into a truck you can drive anywhere, fast.

Donors: 2011+ F-150 5.0 (best value, truck intake/tune) and 2011+ Mustang GT 5.0. Generations matter: Gen 1 (’11–’14, 412–420 hp) is simplest and cheapest; Gen 2 (’15–’17, 435 hp) adds power and revised heads; Gen 3 (’18+, 460 hp) brings port + direct injection, more power, and more wiring/control complexity; Gen 4 (’24+, ~486–500 hp) is just landing in vendor catalogs. Gen 3/4 + the 10R80 is the default spec for new builds; Gen 1/2 + 6R80 is the budget lane. Buy the whole donor or a control pack, not a bare long-block and hope. (Generation ratings via Mustang Engines / Tom’s Offroad.)

🐴 412–500 hp by generation💲 The big-ticket avenue — costed honestly below🔧 Advanced · 4–5/5

Full swap parts list — shop the build

Spec’d for a 1967–72 Bumpside. The control pack, fuel system and cooling carry across all generations; mounts, headers and crossmembers are generation-specific — order your truck’s version.

  • 5.0 Coyote donor engine — F-150 or Mustang, Gen 1/2/3 Find donors → Affiliate slot
  • Ford Performance control pack — ~$2,100–$2,730 by gen & trans; treated as non-negotiable Shop → Affiliate slot
  • Coyote swap motor mounts — bumpside frame (Fat Fender kits ~$985 w/ 6R80 crossmember) Shop → Affiliate slot
  • Transmission: 6R80 / 10R80 auto or MT82 manual + adapter Shop → Affiliate slot
  • US Shift Quick 6 standalone controller — for a 6R80 run without the full donor harness Shop → Affiliate slot
  • Swap headers that clear a bumpside (Fat Fender 1965–79 Coyote headers: $2,174.99) Shop → Affiliate slot
  • Fuel system: in-tank pump, regulator, lines for EFI pressure Shop → Affiliate slot
  • Cooling: swap radiator, fans & Coyote hose kit Shop → Affiliate slot

Realistic cost: Street Trucks’ F-100 Coyote guide (updated Sept 2026) puts a salvage-donor build at $17,500–$28,500 all-in, parts and labor, and a new-crate build at $22,000–$34,000, at 40–60 shop hours. A parts-only DIY build around a used F-150 pullout can land nearer $10,000–$18,000 (published figure via Tom’s Offroad, same drivetrain). The ranges don’t conflict — one includes labor, one doesn’t — and the guide labels which is which, plus the line items everyone forgets (control pack, fuel system, cooling, transmission) so there are no $2,000 surprises at first fire.
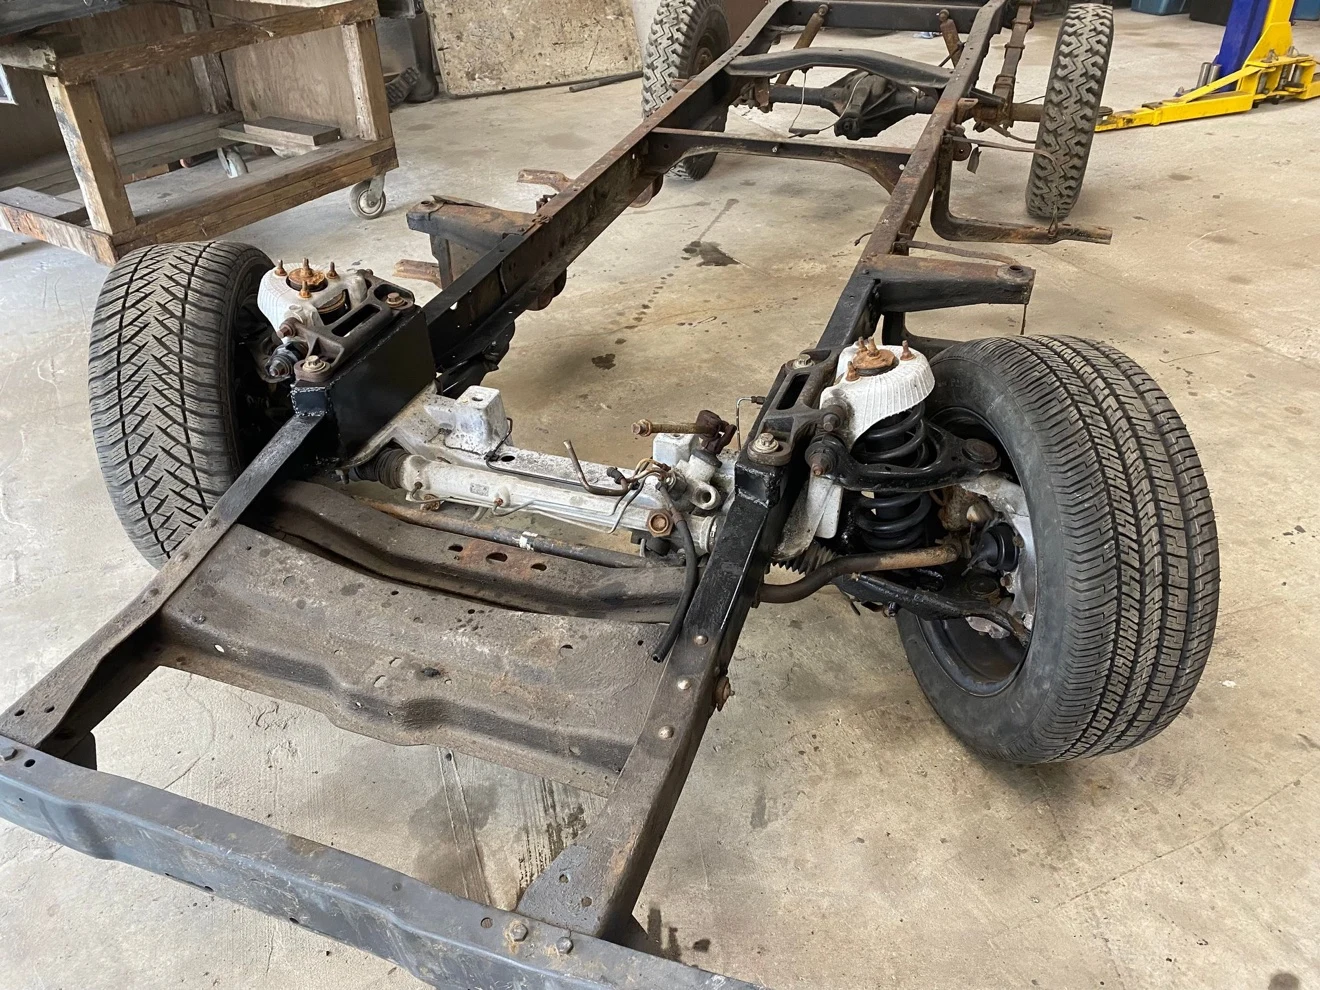
Bare F-100 frame with the Crown Victoria aluminum front crossmember, rack-and-pinion steering and coil springs installed
The swap, in the metal — our frame

Crown Vic Swap

Fits · Chiefly 1967–79 — Bumpside & Dentside

Year check: the CV cradle matches the ’67–’79 frame width, which is why this is a Bumpside/Dentside swap. On ’53–’66 trucks the frame is a different width and Mustang II is the usual answer; on Bullnose trucks the frame changed again — drop beams or bolt-in kits are the lane there.

The one that changed bumpside building. A 2003–11 Crown Victoria / Grand Marquis / Town Car front cradle gives you modern independent suspension, rack-and-pinion steering, and 12″ disc brakes — the whole hub-to-hub assembly unbolts from the donor with just 10 bolts (Blue Oval Trucks). Pre-2003 Panthers don’t work, ex-police/taxi clips are usually tired, and MotorTrend warns to check the aluminum crossmember for stress cracks. Our own cradle is already pulled and on stands.

The 2026 math: clips that historically ran $400–$750 have crept up — budget $500–$1,000 for the clip (an estimate; prices are documented as rising, and no 2026 yard survey exists) and $1,500–$3,000 all-in refreshed with joints, brakes, hoses and steering sorted.

The known flaw — and the fix industry it spawned: the Crown Vic track runs ~3¾″ wider than a bumpside wants (per QA1’s comparison), forcing high-offset, modern-style wheels and ruling out deep-dish classics. The 2025–26 answers are in the parts list: a narrowed crossmember, coilover conversions for the stock clip, and electric power steering.

⏱ Weekend + fab time💲 $500–$1,000 clip · $1,500–$3,000 in & refreshed🔧 Intermediate · 3/5

Parts list — shop the build

  • ’03–’11 Crown Vic front cradle, complete Find it → Affiliate slot
  • Swap brackets, spacers & hardware kit Shop → Affiliate slot
  • Power steering hoses & fittings Shop → Affiliate slot
  • Team321 narrowed Crown Vic crossmember — $1,495, just over 62″ hub-to-hub; fixes the track width (needs a non-CV rack & sway bar) Shop → Affiliate slot
  • Coilover conversion for the stock CV clip — QA1 / Aldan / ATP, ~$895–$985, ~1½″ more drop Shop → Affiliate slot
  • Range Industries Mustang EPAS electric steering kit — ends the pump-packaging fight on Coyote swaps Shop → Affiliate slot
  • Wheels — 5×4.5″ pattern, high offset (the wide CV track demands it) Shop → Affiliate slot
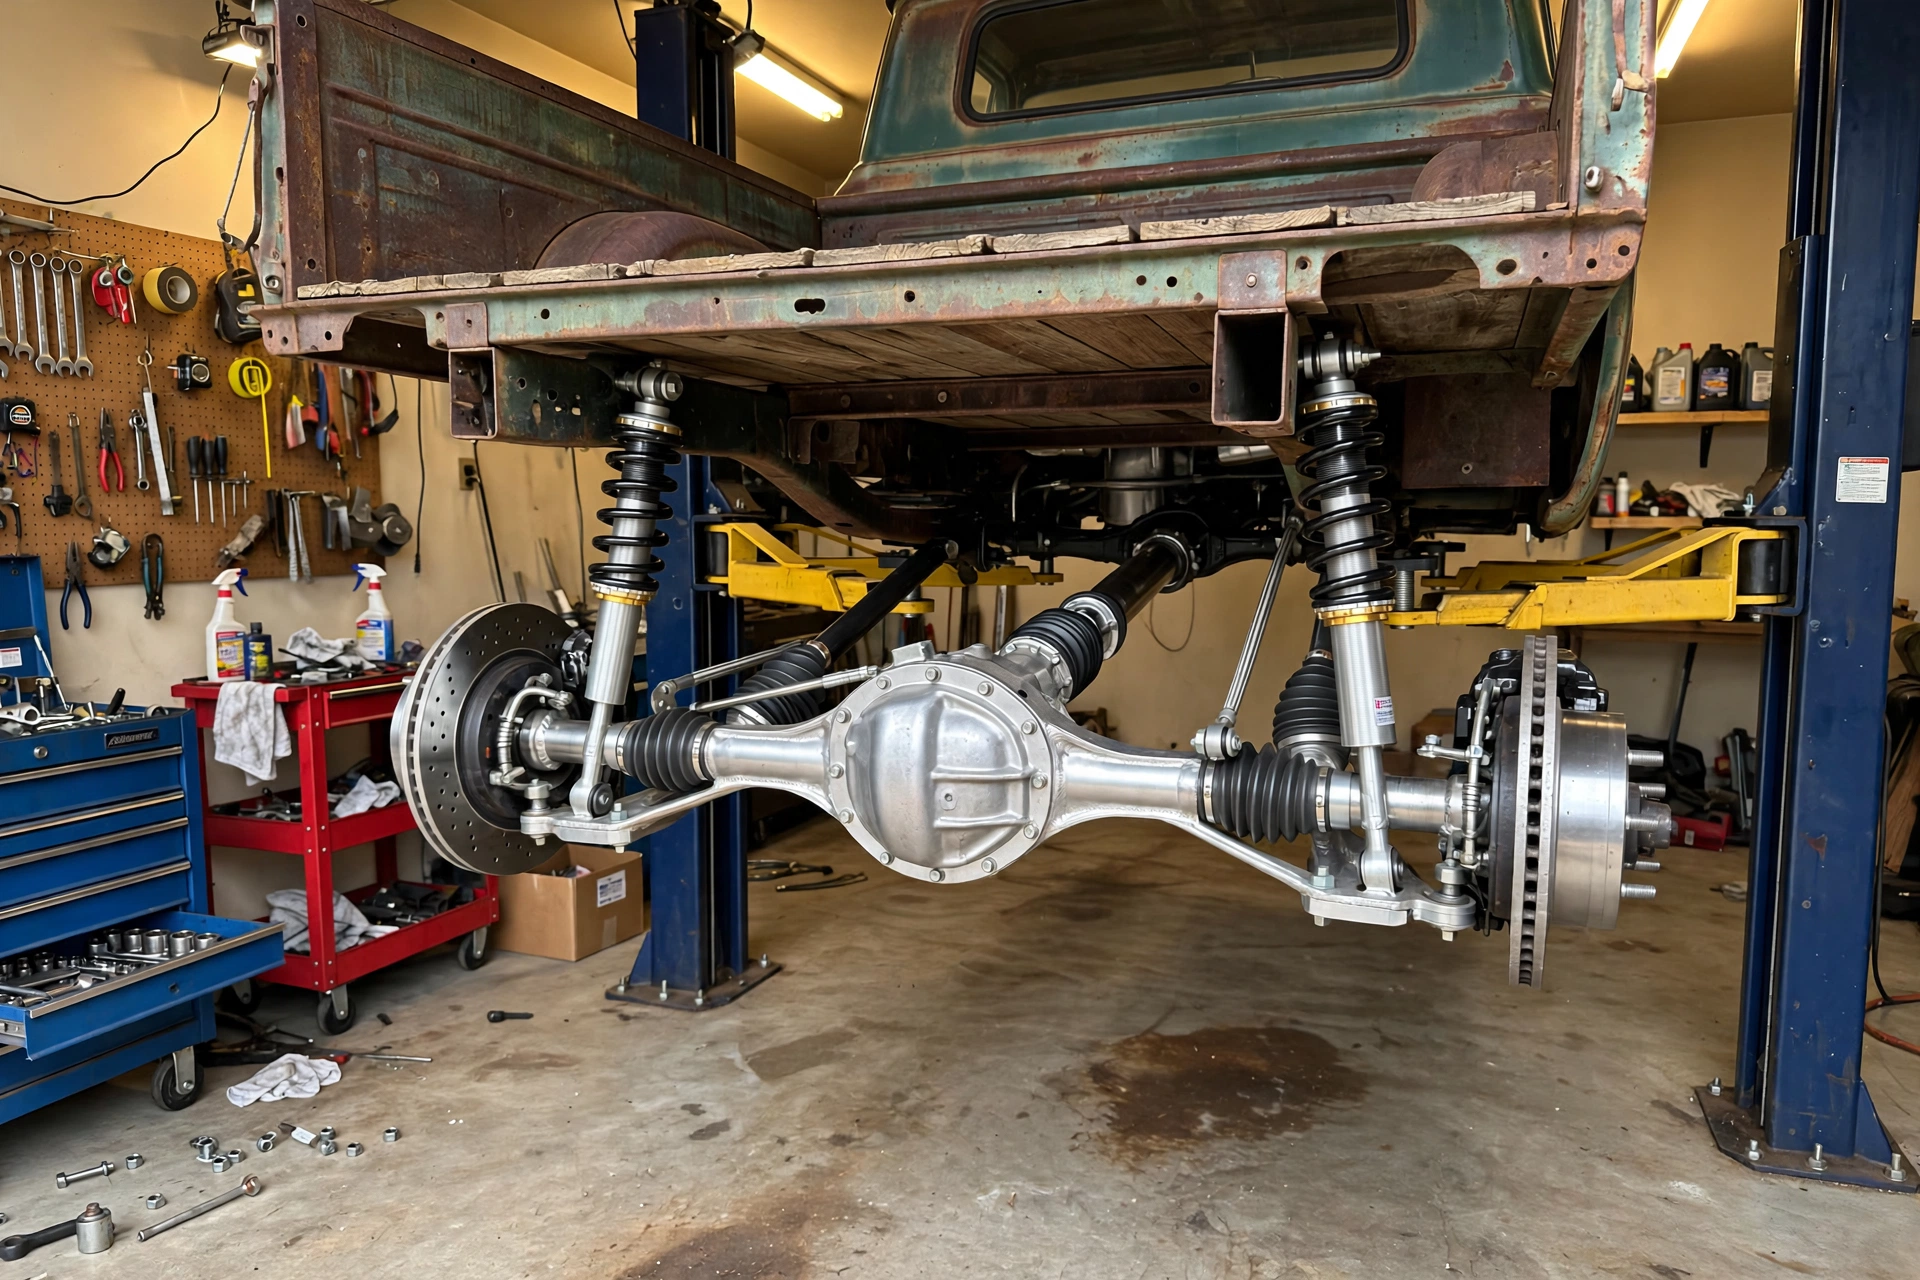
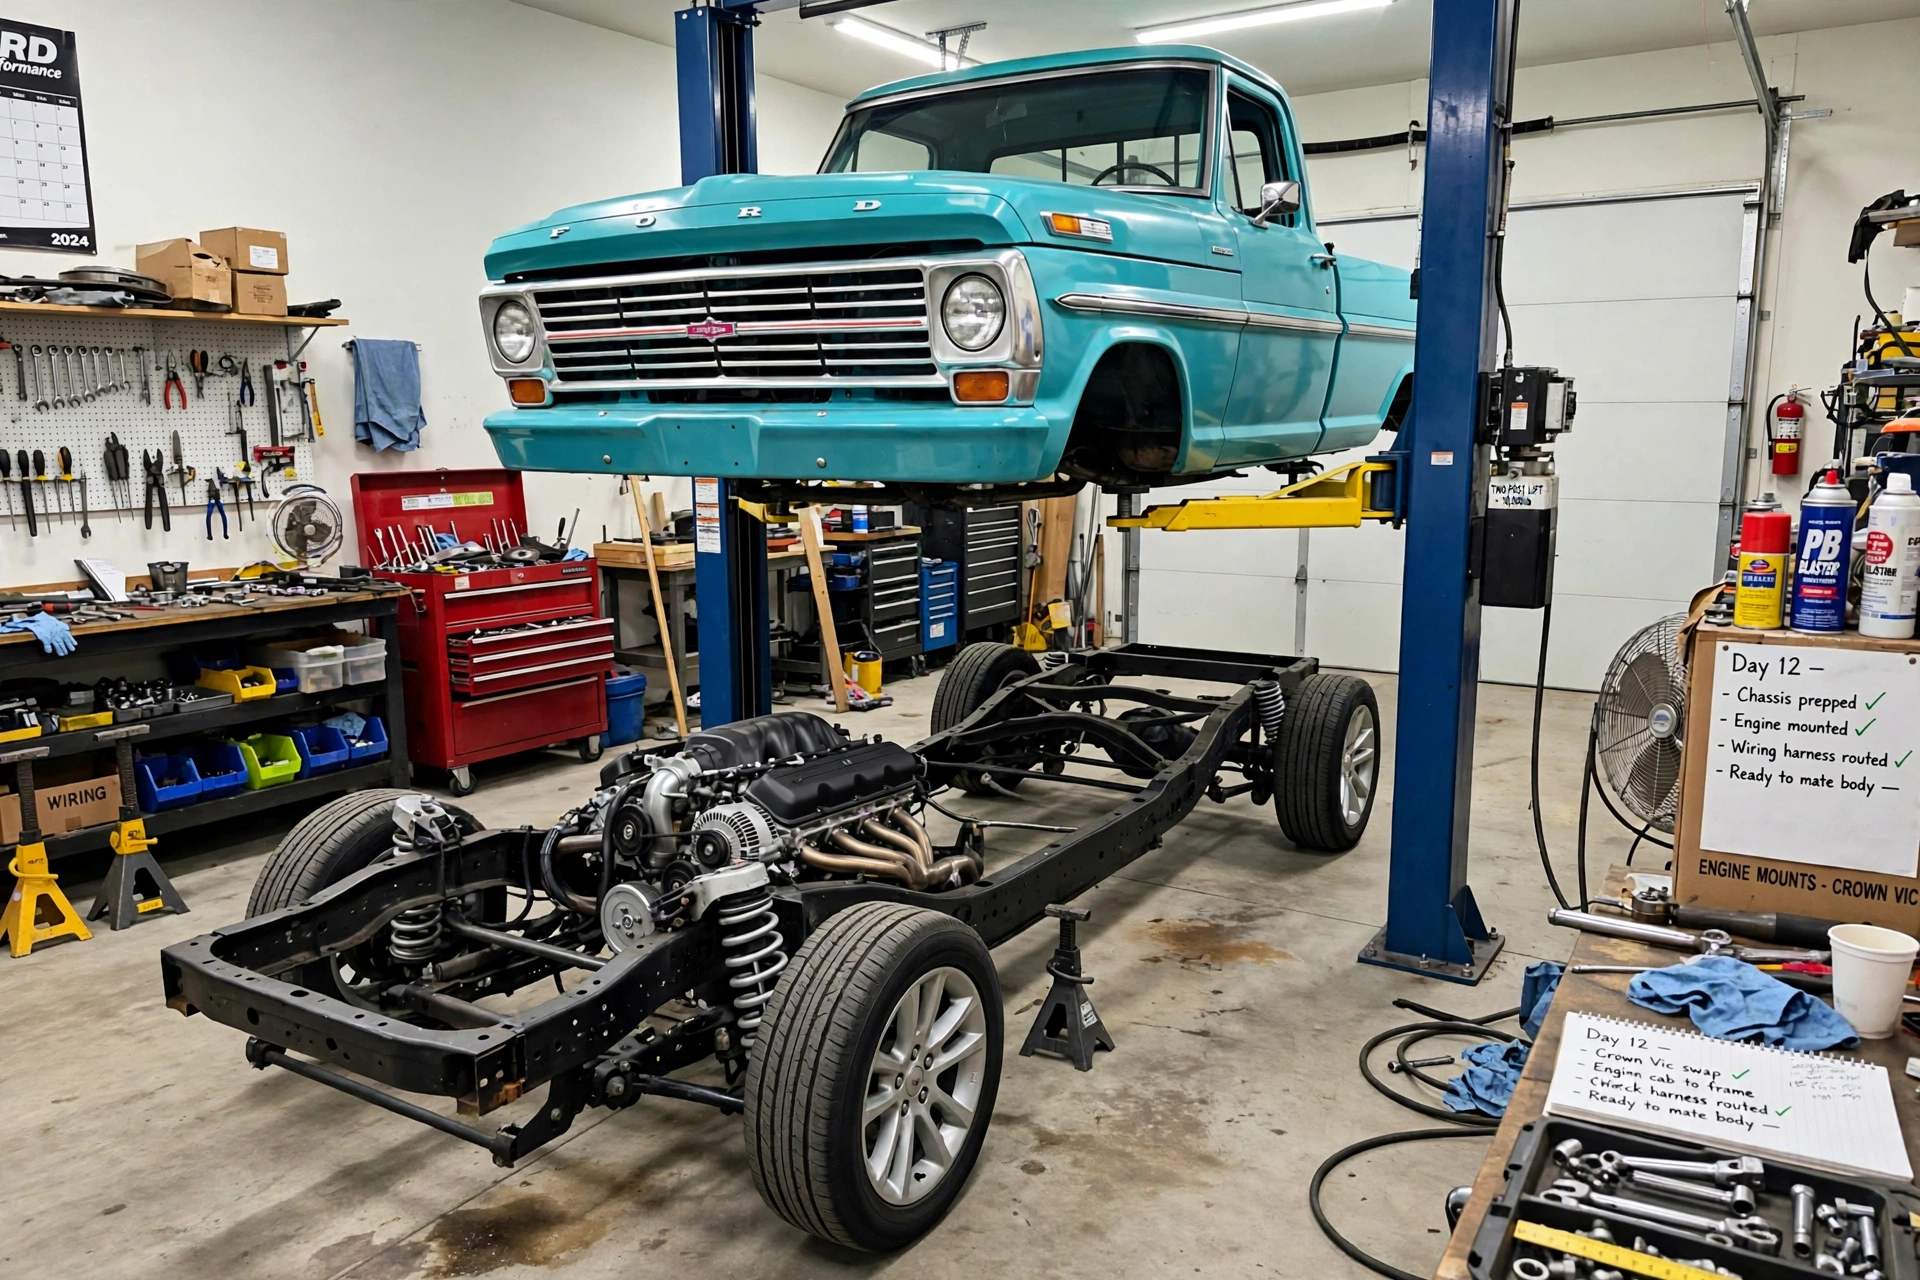
Turquoise bumpside F-100 body lifted on a two-post lift above a complete Crown Victoria rolling chassis — frame, suspension, brakes and V8 — ready to be lowered onto it
The complete swap — body meets chassis

Complete Crown Vic Swap

Fits · Chiefly 1967–79 — Bumpside & Dentside

Year check: wheelbase is the gate. The Panther’s 114.7″ lands within a whisker of a short-bed Bumpside’s 115″, so the body nearly drops on. Long-bed trucks (131″) need the frame stretched or a different plan — and body mounts are fabricated on every one of these swaps.

The front-clip swap grafts a Crown Vic front end onto your truck’s frame. This is the other school: don’t graft — take the whole car. A complete 2003–11 Panther frame goes under your truck body, and you inherit everything at once: independent front suspension, rack-and-pinion steering, four-wheel disc brakes, a coil-sprung linked rear, the fuel tank already sitting under the bed where it belongs, and modern ride and handling — because underneath, your truck now is a late-model sedan. Keep the Panther’s 4.6 and automatic and it’s a full modern drivetrain swap in the same move; or set your own motor on swap mounts.

The honest catches: this is the biggest job on this page — body off, body on, fabricated mounts, steering and pedal hookups, wiring two vehicles into one. The Panther track is wide, so wheels are modern high-offset, same as the front-clip swap. And check your state’s title and registration rules for body-on-frame swaps before the first cut — how the finished truck is titled varies by state.

⏱ Weeks, not a weekend💲 Ballpark — see the two ways below🔧 Advanced · 4–5/5

Parts list — shop the build

  • Whole donor car — ’03–’11 Crown Victoria / Grand Marquis / Town Car, running & complete Find one → Affiliate slot
  • Body mount material — steel stock, bushings & hardware for fabricated mounts Shop → Affiliate slot
  • Steering shaft & U-joints — column to Panther rack Shop → Affiliate slot
  • Brake & fuel line kits — the hookups the donor doesn’t finish for you Shop → Affiliate slot
  • Wheels — 5×4.5″ pattern, high offset (the wide Panther track demands it) Shop → Affiliate slot
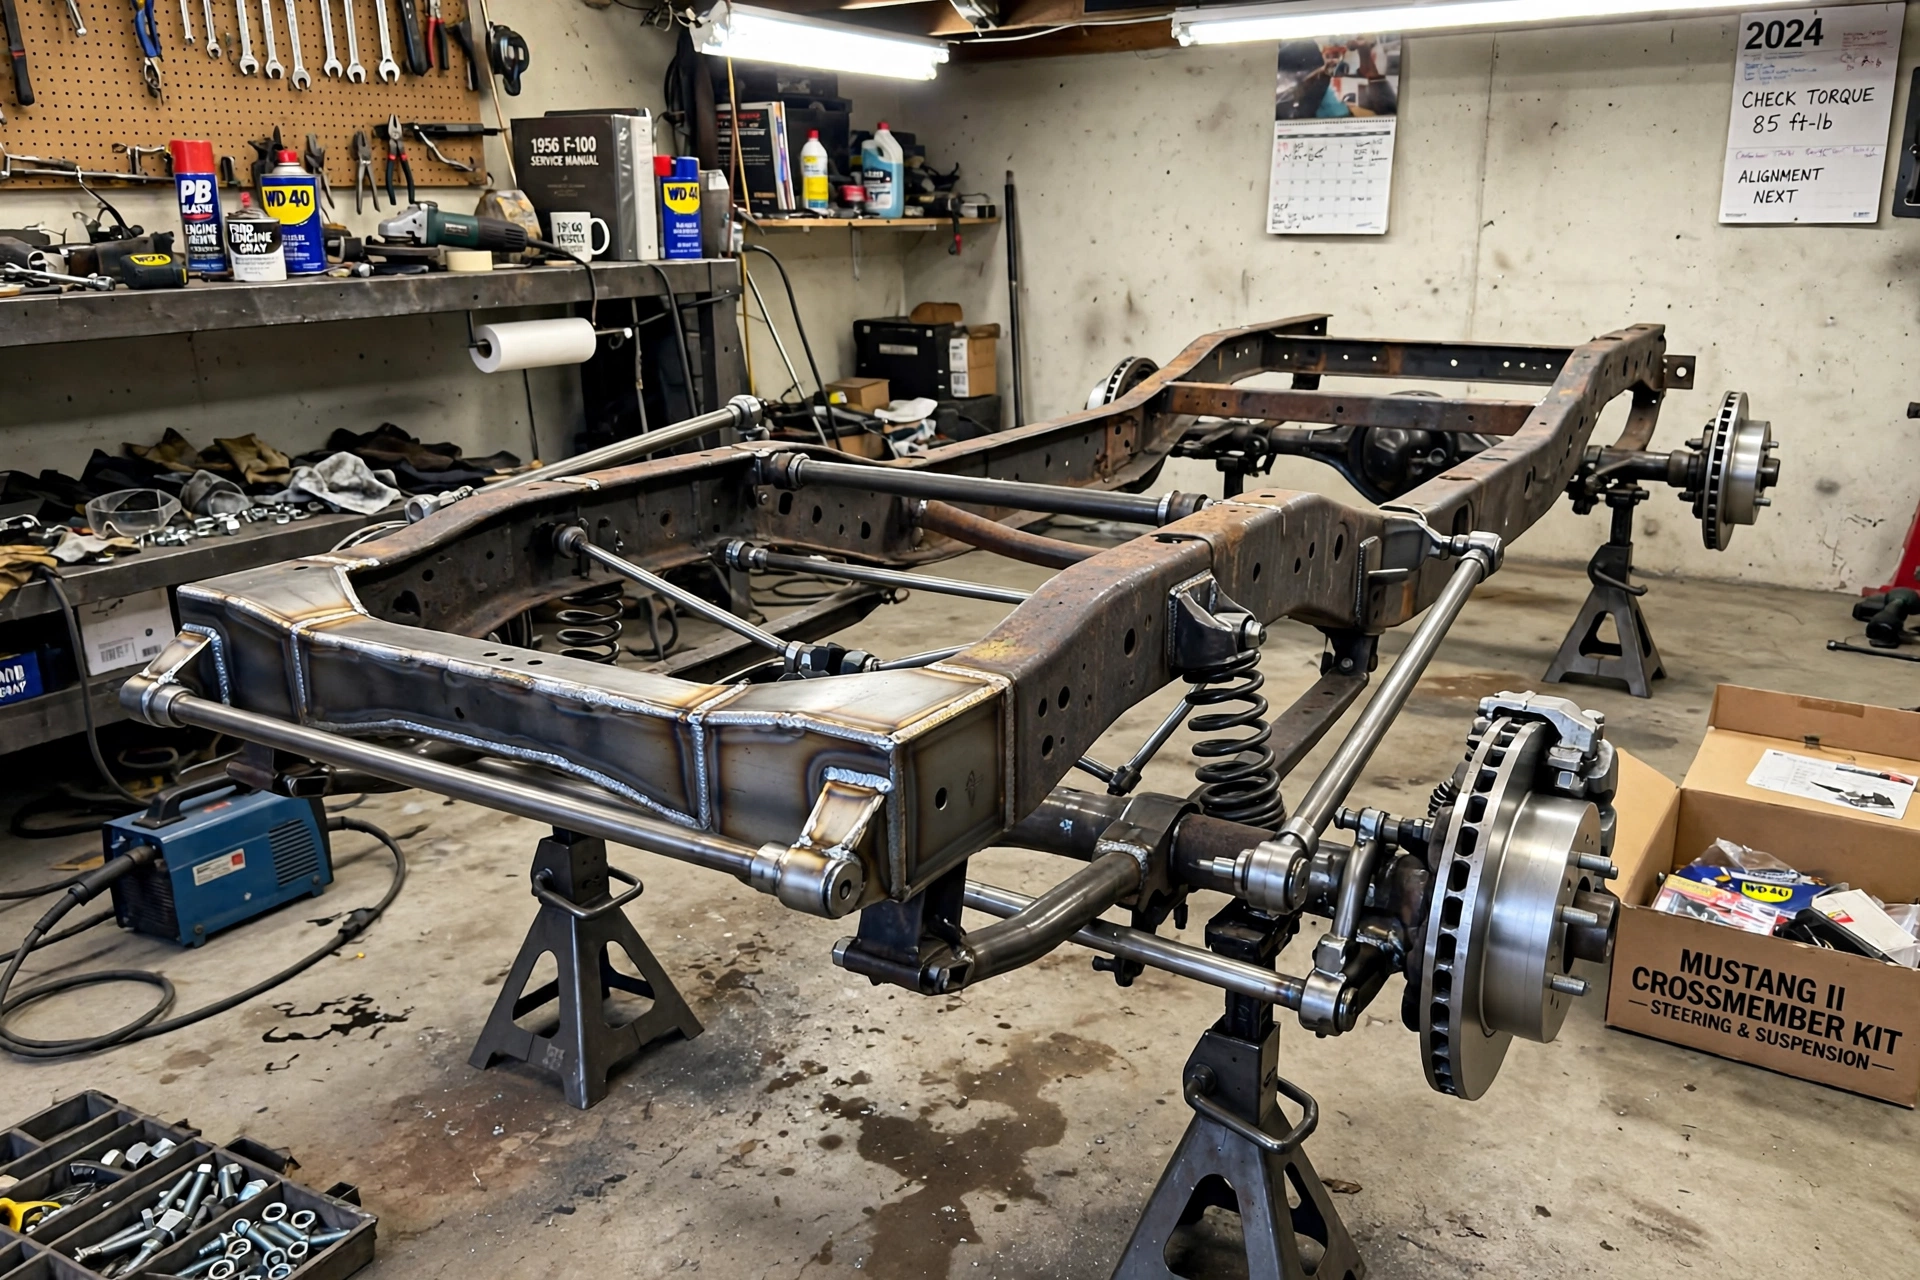
Bare 1950s Ford truck frame on stands with a new Mustang II style weld-in crossmember, tubular control arms, coil springs, rack-and-pinion steering and disc brake spindles installed
The straight-axle answer

Mustang II Front End

Fits · 1953–60 — plus ’61–’64 straight-axle Slicksides

Year check: this is the standard swap on ’53–’56 Effies and ’57–’60 Fridges, and it carries into the ’61–’64 Slicksides that still run a straight axle. From ’65 the Twin I-Beam arrives and the conversation changes — ’65–’66 trucks usually keep their beams.

If your truck left the factory on a straight axle and leaf springs, this is the swap that defined the fix: a weld-in crossmember carrying independent suspension, rack-and-pinion steering and disc brakes, with the drop built into the geometry. It’s been the Effie and Fridge answer for decades — on these generations it’s not a fad, it’s the right call — and Speedway’s complete weld-in kits run $2,947–$3,557.

Why not junkyard the whole thing? Original Mustang II and Pinto donors are thin on the ground now, and forty-year-old wear parts aren’t a bargain. The budget lane is an entry-level weld-in kit with new wear parts — the crossmember is welded to your frame, so this is the one front end where “buy the kit” is the honest advice even on this site.

⏱ A long weekend + welding💲 Kits $2,947–$3,557🔧 Advanced · 4/5 — it welds in

Parts list — shop the build

  • Complete Mustang II weld-in IFS kit — crossmember, arms, spindles, brakes (Speedway, $2,947–$3,557) Shop → Affiliate slot
  • Dropped spindles — extra drop beyond the kit’s built-in stance Shop → Affiliate slot
  • Steering shaft & U-joints — your column to the new rack Shop → Affiliate slot
  • Power steering pump, hoses & fittings (if running power rack) Shop → Affiliate slot
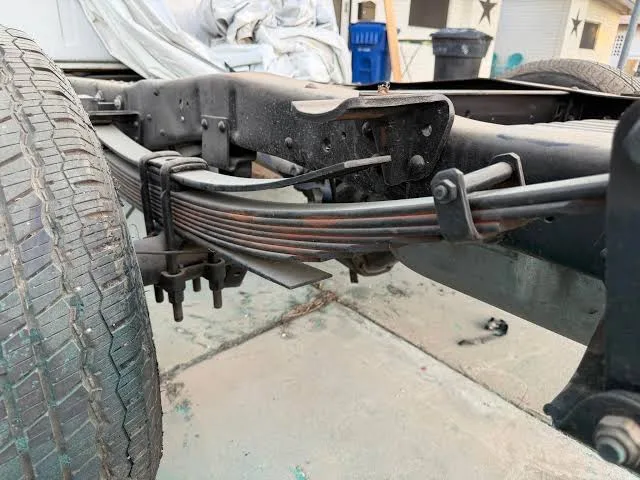
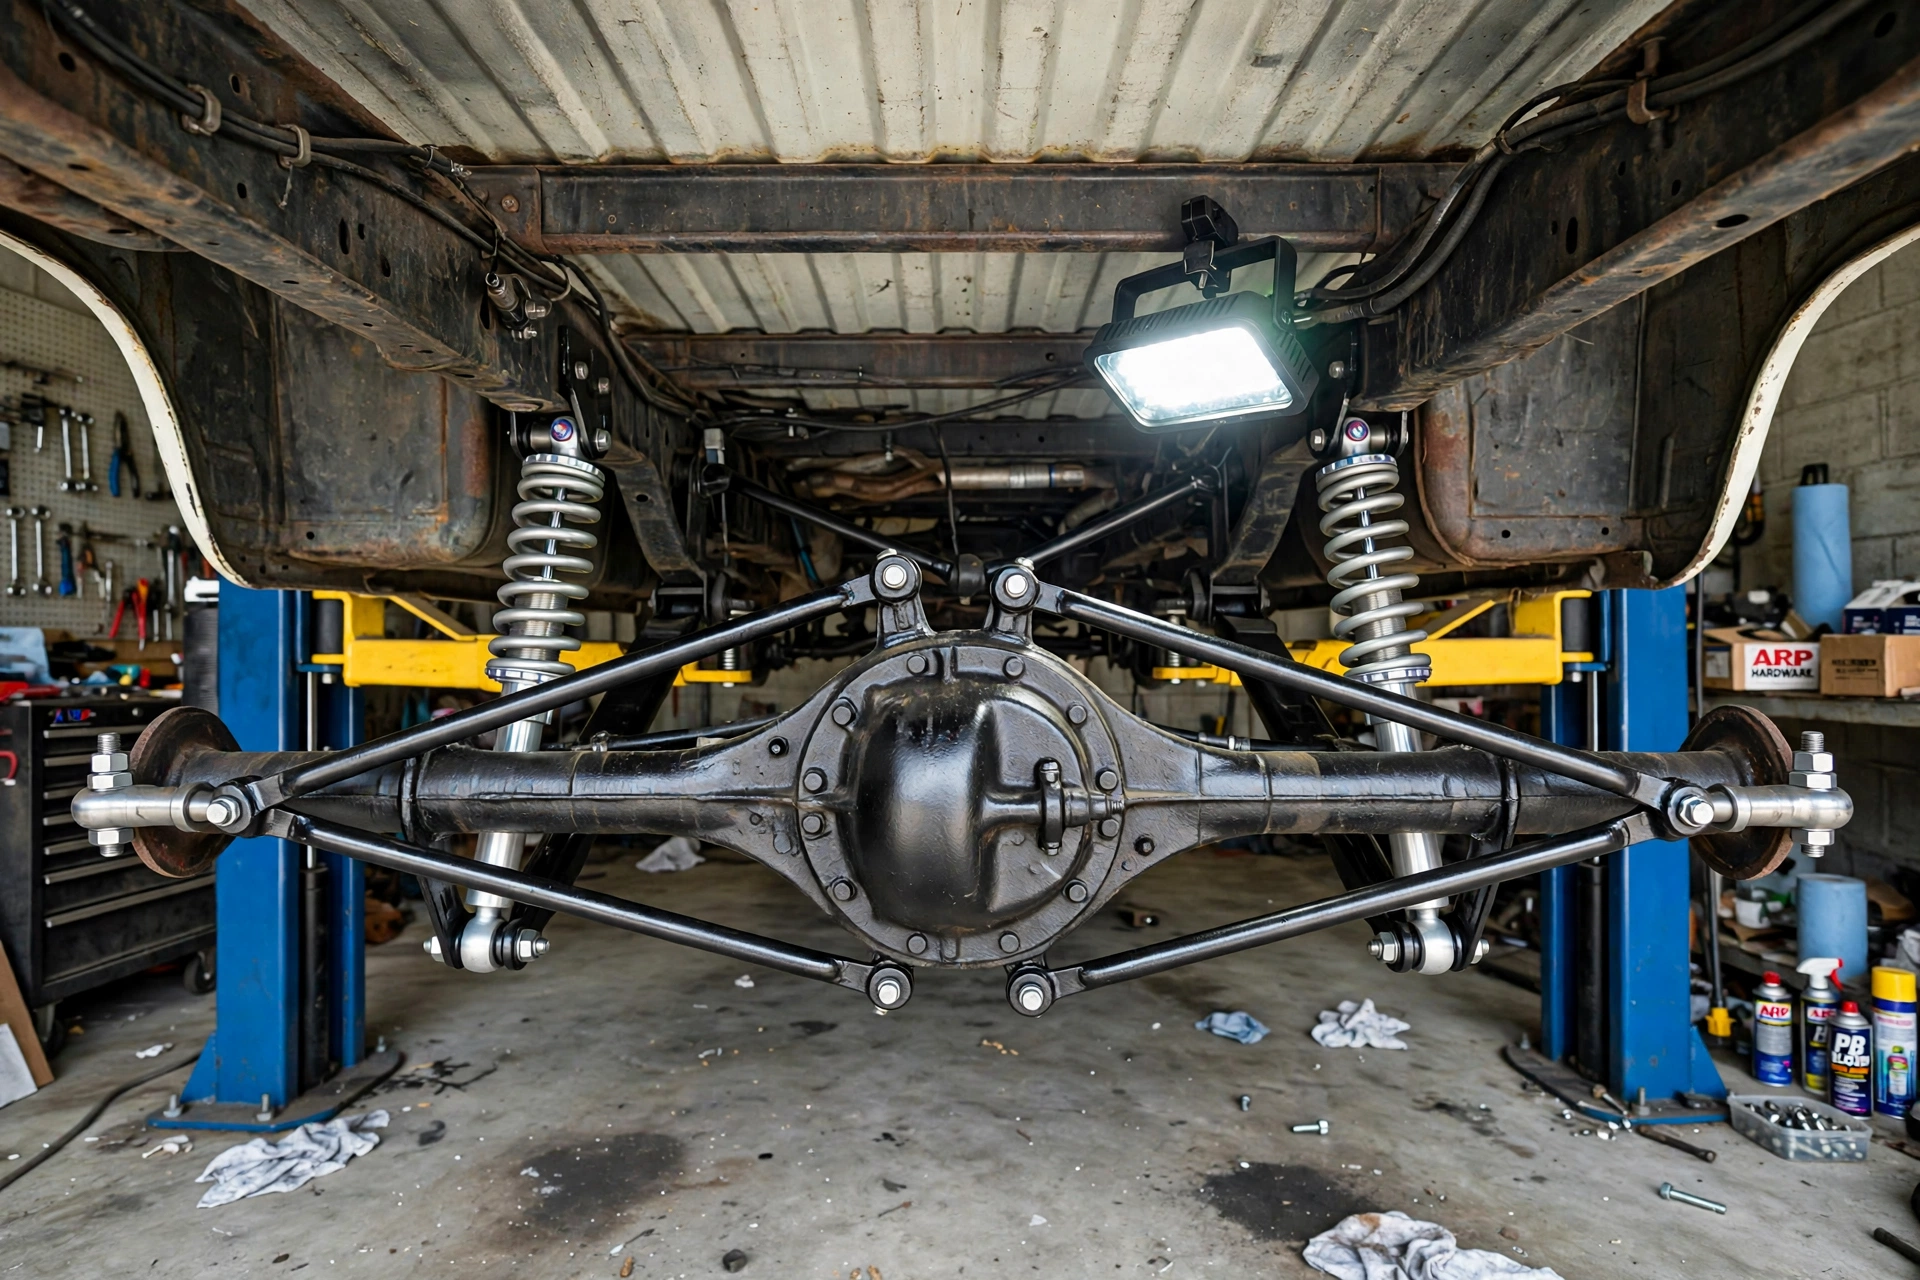
Close-up of the factory rear suspension on our Project ’72 bumpside: the leaf spring pack rides over the axle tube, U-bolts strapped over the pack — the stock setup before the flipBefore · stock
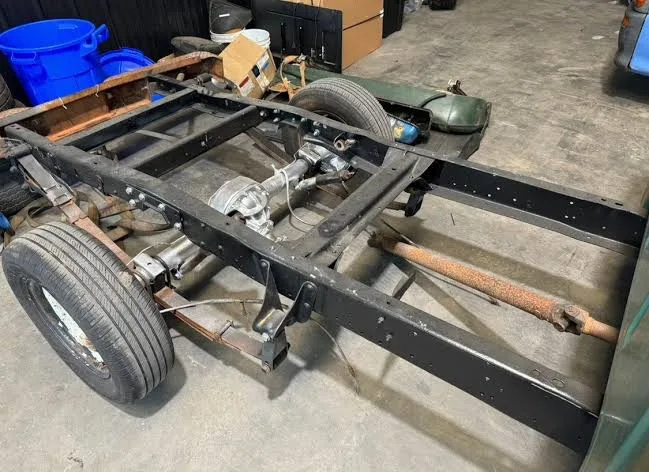
Our Project ’72 frame after the flip: the rear axle now sits on top of the leaf spring pack — the same truck, roughly five inches lower out backAfter · flipped

Axle Flip — The Budget Rear Drop

Fits · All generations — every F-100 rear is leaf-sprung

Year check: flip kits are sold per axle and per generation — 9-inch rears and later axles take different perches and U-bolts, so order for your truck. The job itself is the same on a ’55 as on a ’75: axle under the springs from the factory, axle on top after the flip.

From the factory your rear axle hangs under the leaf springs. A flip kit moves it on top of the spring pack — and the truck drops by roughly the thickness of the axle tube and perch, about 5–6″, for the price of hardware. It’s the oldest budget drop in the truck world, and paired with a Crown Vic front or drop beams out front, it’s how most budget stance builds get their look.

The three things that come with it: at 5–6″ of drop the axle runs out of upward travel, so a C-notch in the frame over the axle is part of the job, not an option. The shocks end up too long and laid near-flat — shock extenders or shorter drop shocks fix the angle. And moving the axle changes the pinion angle — a set of angle shims keeps the U-joints happy and the driveline vibration-free.

⬇ ~5–6″ rear drop💲 The cheapest real drop — hardware money🔧 2/5 · a Saturday job

Parts list — shop the build

Order by your axle: flip kits are per-generation and per-axle (9-inch vs. later axles). The C-notch and shock parts are the same story on every generation.

  • Axle flip kit — new spring perches, U-bolts & plates for your axle Shop → Affiliate slot
  • C-notch kit — frame notch plates, $150–$400 Shop → Affiliate slot
  • Shock extenders or shorter drop shocks — restores the shock angle after the flip Shop → Affiliate slot
  • Pinion angle shims — dial the U-joint angles back in Shop → Affiliate slot
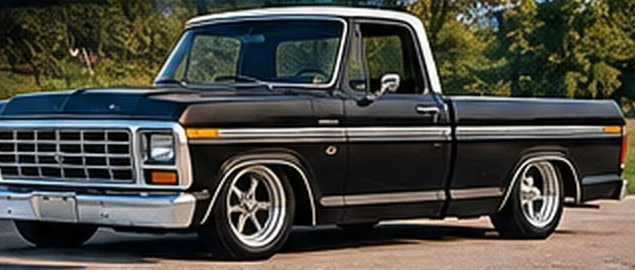
Lowered black-and-white dentside F-100 short bed — the proportions a bed shortening buys
Long bed → short bed

Bed Shortening

Fits · Any generation with a long bed — cuts vary by generation

Year check: the cuts below are Bumpside Styleside numbers (8-ft bed → short bed). Slickside and Dentside beds start from different lengths and wheelbase math, Flareside/Stepside beds section differently again, and Effie/Fridge conversions are far less common — never carry one generation’s measurements onto another truck.

Long beds are cheaper and easier to find — short beds are what everybody wants, and they carry a real price premium. Cut the frame, section the bed, and turn an 8-footer into the truck you actually pictured. Even Fat Fender Garage’s $250k shop truck started life as a long bed (via MotorTopia) — the arbitrage works at both ends of the market.

The cuts, exactly: 16″ out of the frame directly behind the cab (131″ → 115″ wheelbase) plus 4″ off the rear of the frame — the short bed is ~20″ shorter overall, and the bed itself loses 16″ at the front and 4″ at the rear so the wheel opening stays centered. Or skip the bed bodywork: reproduction short bedsides run ~$757–$800 each at CJ Pony Parts, and a complete new bed lands ~$2,000–$3,500 before paint. CPP’s template kit turned the frame job into an afternoon with a drill, a saw and basic hand tools — though welding the splice plates is still recommended over bolts alone.

📏 16″ + 4″ cuts · 131″ → 115″💲 ~$600–$1,000 DIY · $2,500–$4,500 w/ new bed🔧 3/5 with the kit · 4–5/5 freehand

Parts list — shop the build

Generation-specific: the CPP kit below is the 1967–72 Bumpside kit. Kits and panels are sold per generation — match the part number to your years.

  • CPP 6772LBFSK frame-shortening kit — cutting templates + splice plates, $339 Shop → Affiliate slot
  • Reproduction short-bed sheetmetal — bedsides ~$757–$800 ea. Shop → Affiliate slot
  • Cutting discs, flap discs & weld consumables Shop → Affiliate slot
  • Short-bed fuel tank & straps Shop → Affiliate slot
  • Shortened driveshaft service / new shaft Shop → Affiliate slot
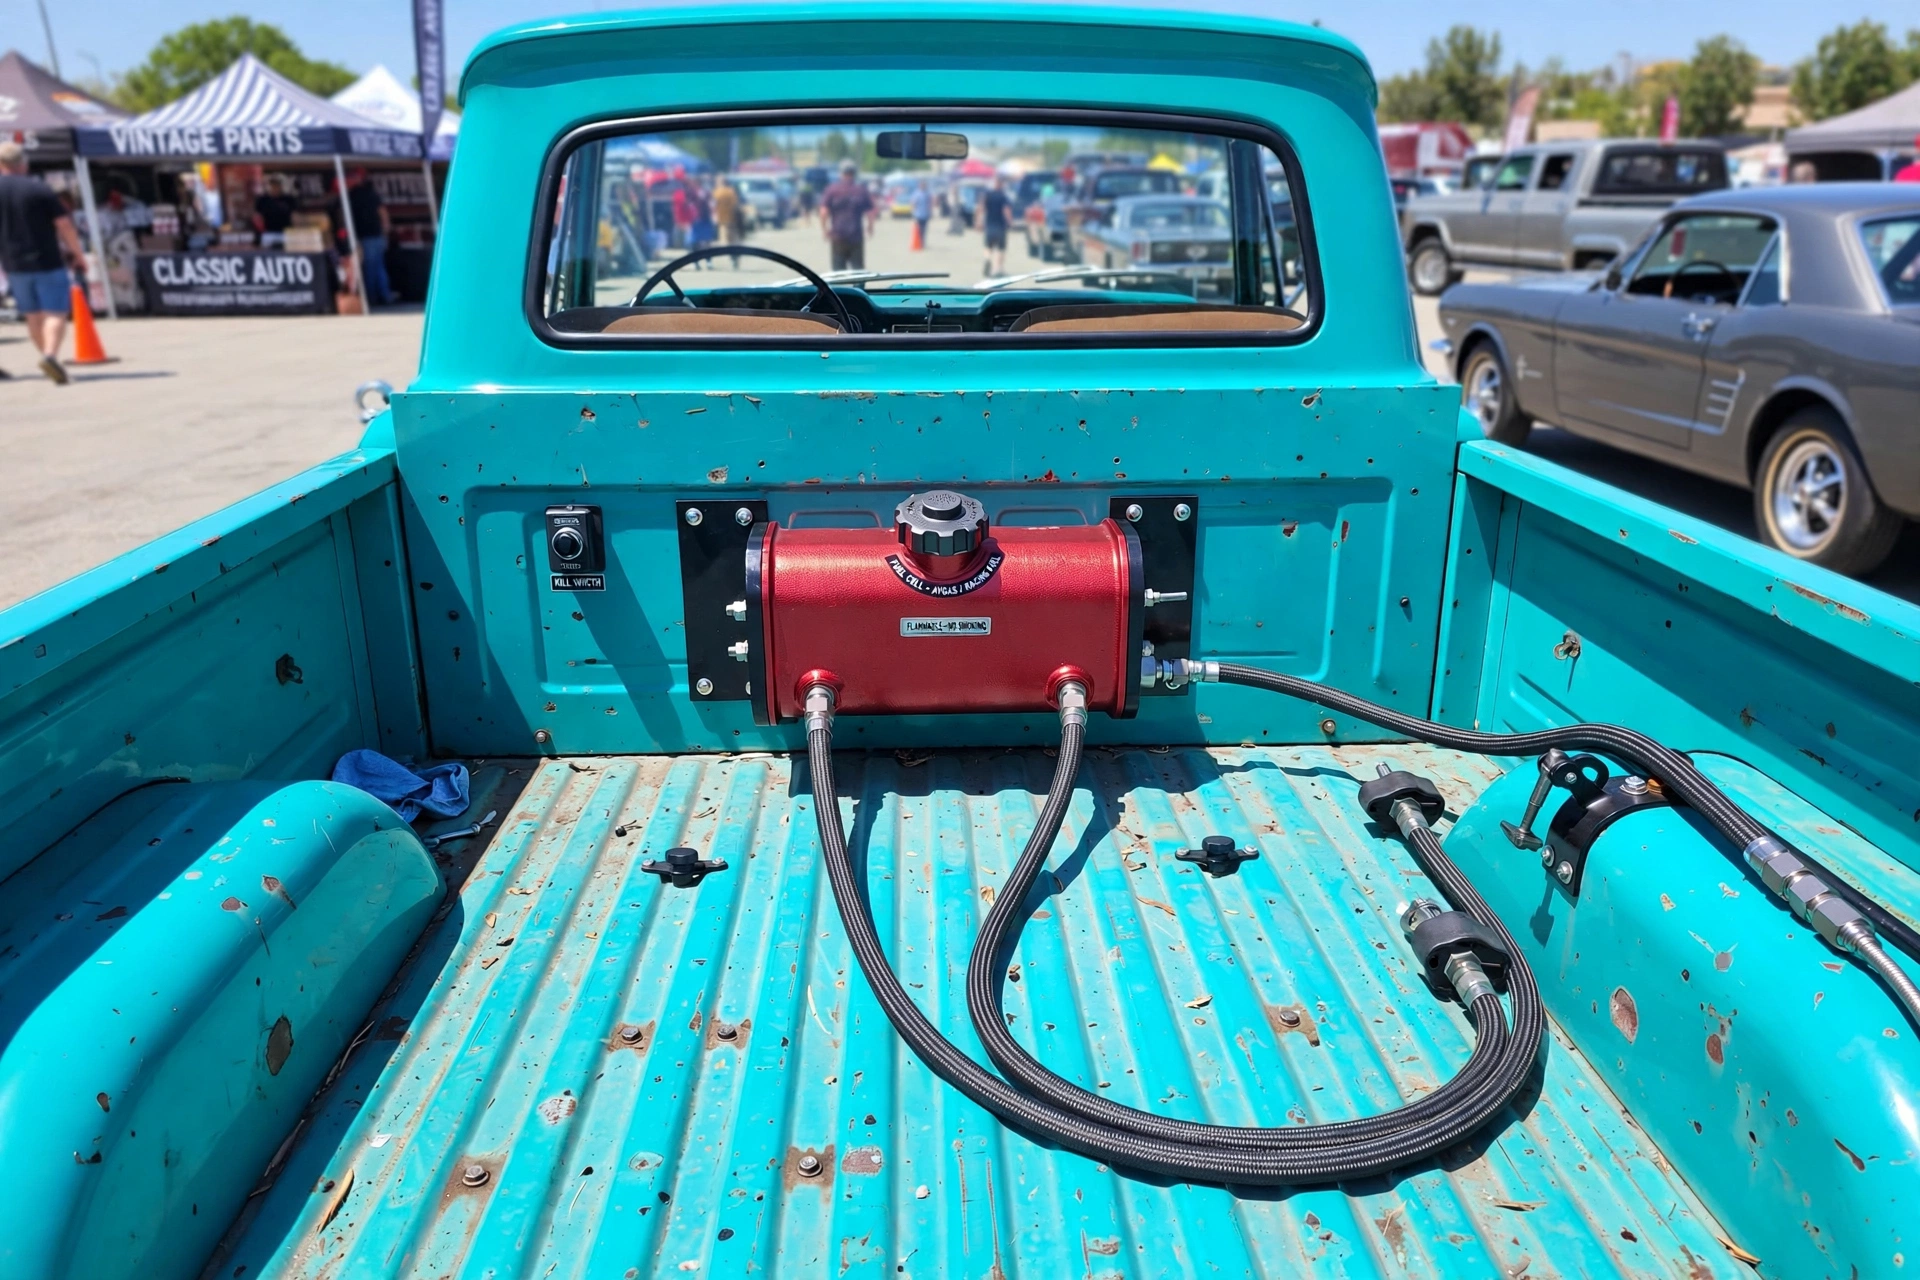
Red anodized racing fuel cell with a black aircraft-style filler cap bolted into the bed of a turquoise classic Ford F-100
The race-cell version, in the bed

Fuel Tank Relocation

Fits · 1953–72 — the in-cab-tank trucks

Year check: Ford put the fuel tank inside the cab, right behind the seat, through 1972 — that’s why this job belongs to the Effie, Fridge, Slickside and Bumpside. From ’73 the tank moved under the bed at the factory and there’s nothing to relocate.

Sixteen-plus gallons of gasoline behind your seat: the fumes on a hot day, the slosh, the lost storage — and the safety math nobody likes. The fix owners have done for decades: an under-bed tank mounted between the rear frame rails behind the axle, filled through the bed floor or a bedside cap, with the behind-seat space suddenly yours again. The other lane is the race cell in the bed — a baffled, bladder-style cell bolted in up front in the bed: the track and pro-touring choice, at the cost of some bed space. Either way, the job doubles as EFI prep — under-bed tanks come in in-tank-pump versions, which is exactly what a Sniper or a Coyote wants.

⛽ In-cab tank out · under-bed or cell in💲 Ballpark — see the two ways below🔧 2/5 · a weekend job

Parts list — shop the build

  • Under-bed fuel tank kit — tank, straps & sender, sized for your frame Shop → Affiliate slot
  • In-tank EFI pump version — order it now if EFI is in your future Shop → Affiliate slot
  • Race fuel cell — baffled cell for the in-bed route Shop → Affiliate slot
  • Filler neck, cap & bed-floor filler hardware Shop → Affiliate slot
  • Fuel line, hose & vent hardware — frame-rail run to the motor Shop → Affiliate slot
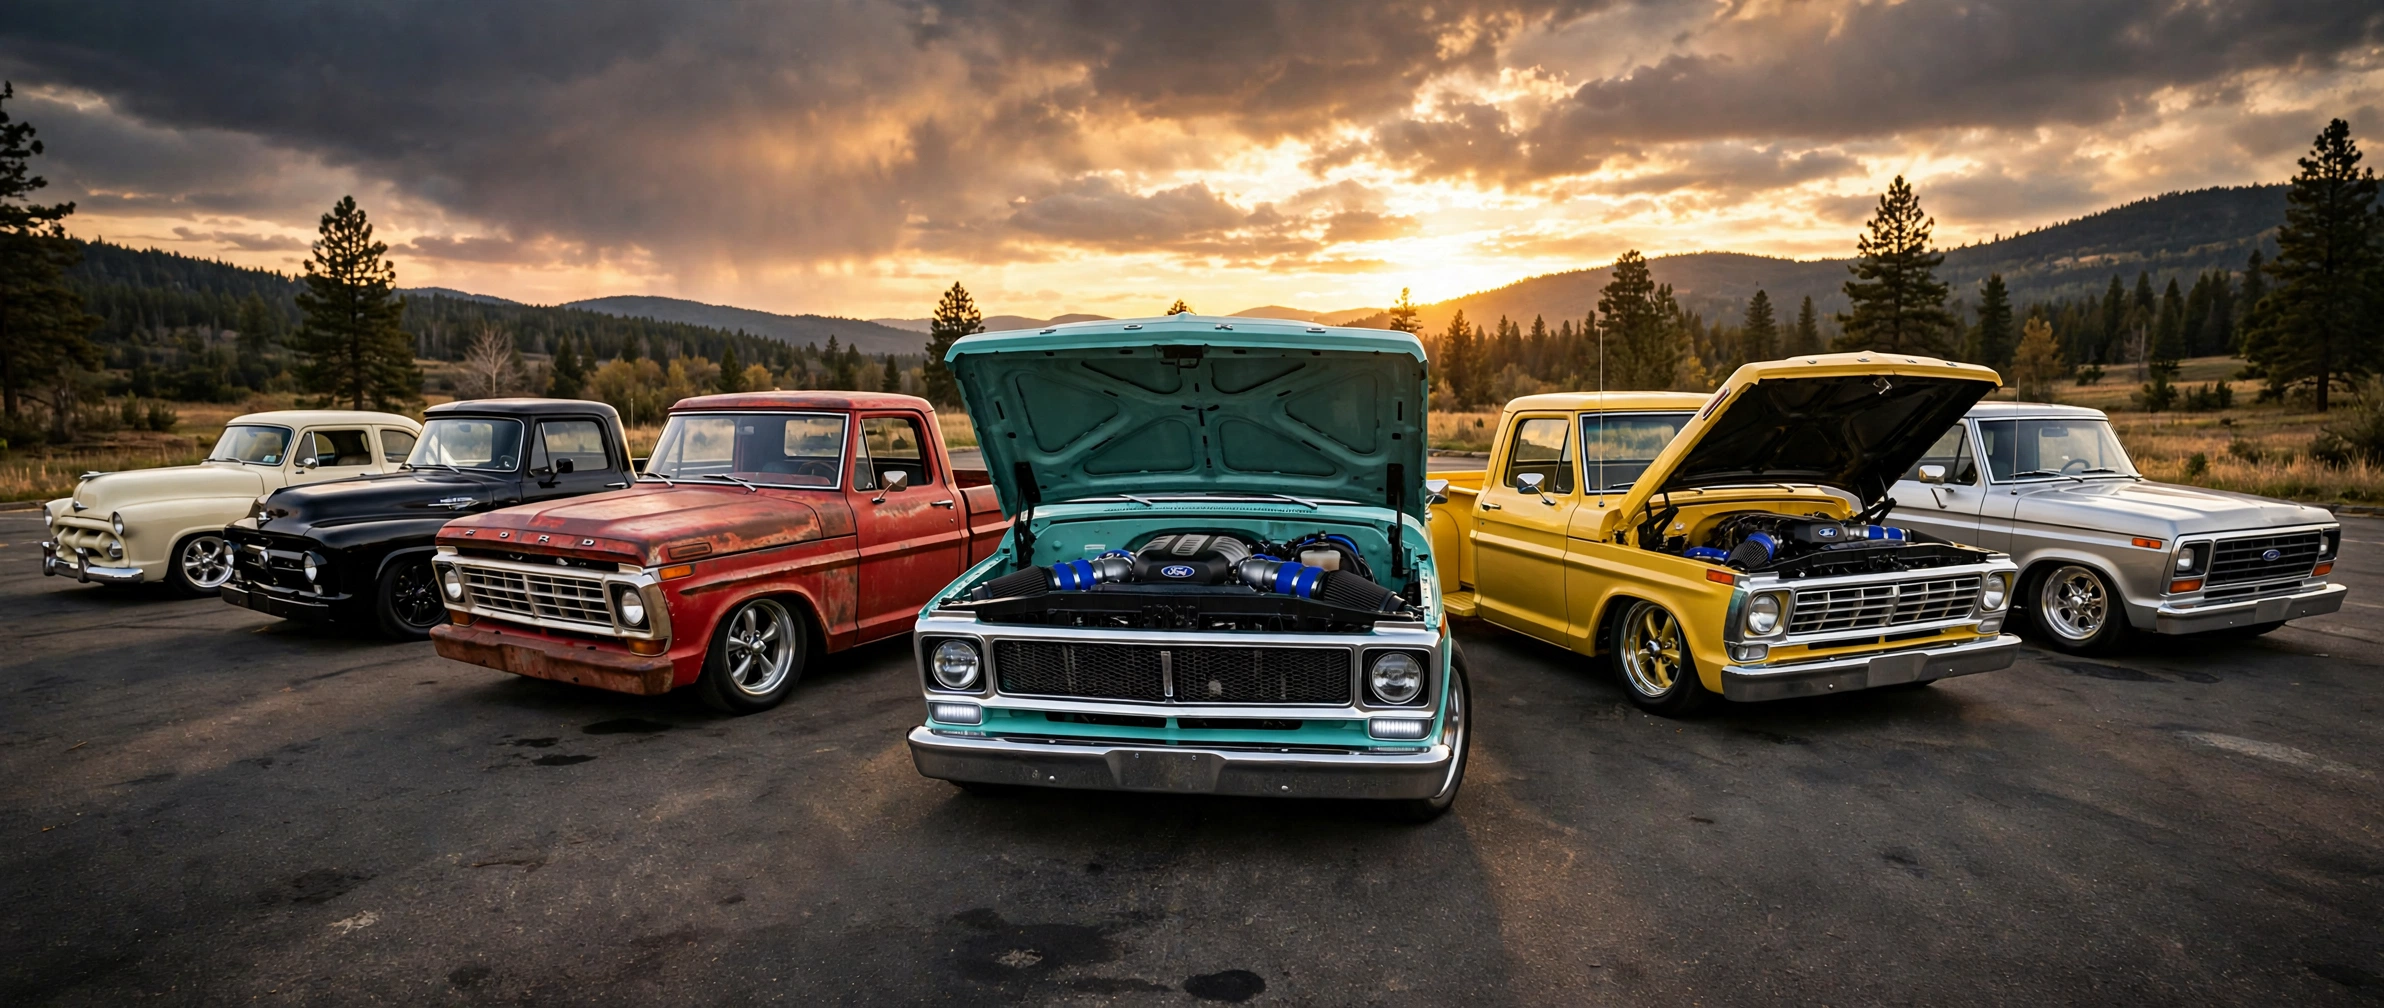
Six F-100 restomods sitting right on full suspension changes — drop beams, swaps and coilovers
Stance is everything

Full Suspension Change

Fits · All generations — the right answer changes by front end

Year check: straight-axle trucks (’53–’64) drop with axles or a Mustang II swap; Twin I-Beam trucks (’65–’86) drop with beams. Parts below are labeled by which front end — and which years — they actually fit.

Beyond the Crown Vic front: dropped I-beams if you’re keeping it old-school, flip kits and C-notches out back, coilovers, sway bars, and the wheel-and-tire math that makes a lowered truck still drive like a truck — not a pogo stick.

Where the money is actually going in 2026: truck-specific bolt-in coilover crossmembers — QA1’s F-100 front system (from $4,359.95, 3–5″ drop, no welding, ~150 lb lighter; prices verified at qa1.net, Oct 2026) and RideTech’s ($3,995, ~5″ drop, optional ShockWave air version). That’s 4–6× a Crown Vic clip, and buyers pay it for all-new parts, a correct narrow track for dished wheels, geometry designed for a lowered truck, and a warranty. On the budget end, DJM’s 2026 budget-makeover math does a 3″ front / 4″ rear drop on Dream Beams for ~$1,000 in suspension parts.

And Mustang II? The honest answer: for bumpsides it’s fading — and that verdict is bumpside-specific. FordMuscle’s history puts it plainly — builders started with Mustang II, moved to the Crown Vic front end, and are now moving to purpose-built bolt-in kits. But on ’53–’56 Effies (and ’57–’60 Fridges) — straight-axle trucks with no Crown Vic option that fits — Mustang II remains the standard, popular, and correct swap (Speedway’s complete weld-in kits run $2,947–$3,557). Only aimed at a ’67–’72 is it yesterday’s answer. Two more signals: full air ride (RideTech’s complete F-100 system, $8,225) is a minority of trucks but a majority of show photos — and the high end has gone full-chassis, from Roadster Shop’s SPEC ($15,495, a dealer listing at AZ Pro Performance) to Fat Fender packages at $30,000–$75,000+ with ~20-week lead times. Porterbuilt is quote-based in practice — its site shows a flat $15,000 that reads as a starting figure — and we could not verify any current No Limit list price, so treat anyone quoting you one as guessing.

⬇ 3″–7″ drops covered💲 ~$300 beams → $4,360+ bolt-in coilovers🔧 1–3/5 static · weld-in kits 4/5

Parts list — shop the build

Mixed generations by design: the QA1 and RideTech front systems fit ’65–’79 Twin I-Beam trucks, Dream Beams are a ’65–’86 beam-truck part, and flip kits are sold per generation — check the years on every line.

  • Rear flip kit + C-notch plates Shop → Affiliate slot
  • Drop shocks (front & rear sets) Shop → Affiliate slot
  • QA1 bolt-in front coilover system, 65–79 F-100 — from $4,359.95 Shop → Affiliate slot
  • RideTech bolt-in front system — $3,995, ShockWave air version available Shop → Affiliate slot
  • DJM Dream Beams dropped I-beams (keep-the-beams builds) Shop → Affiliate slot
  • Wilwood Forged Dynalite big-brake front kit — $1,276–$1,665 by finish; choose by front end, not by year Shop → Affiliate slot
  • Alignment & bump-steer correction kit Shop → Affiliate slot
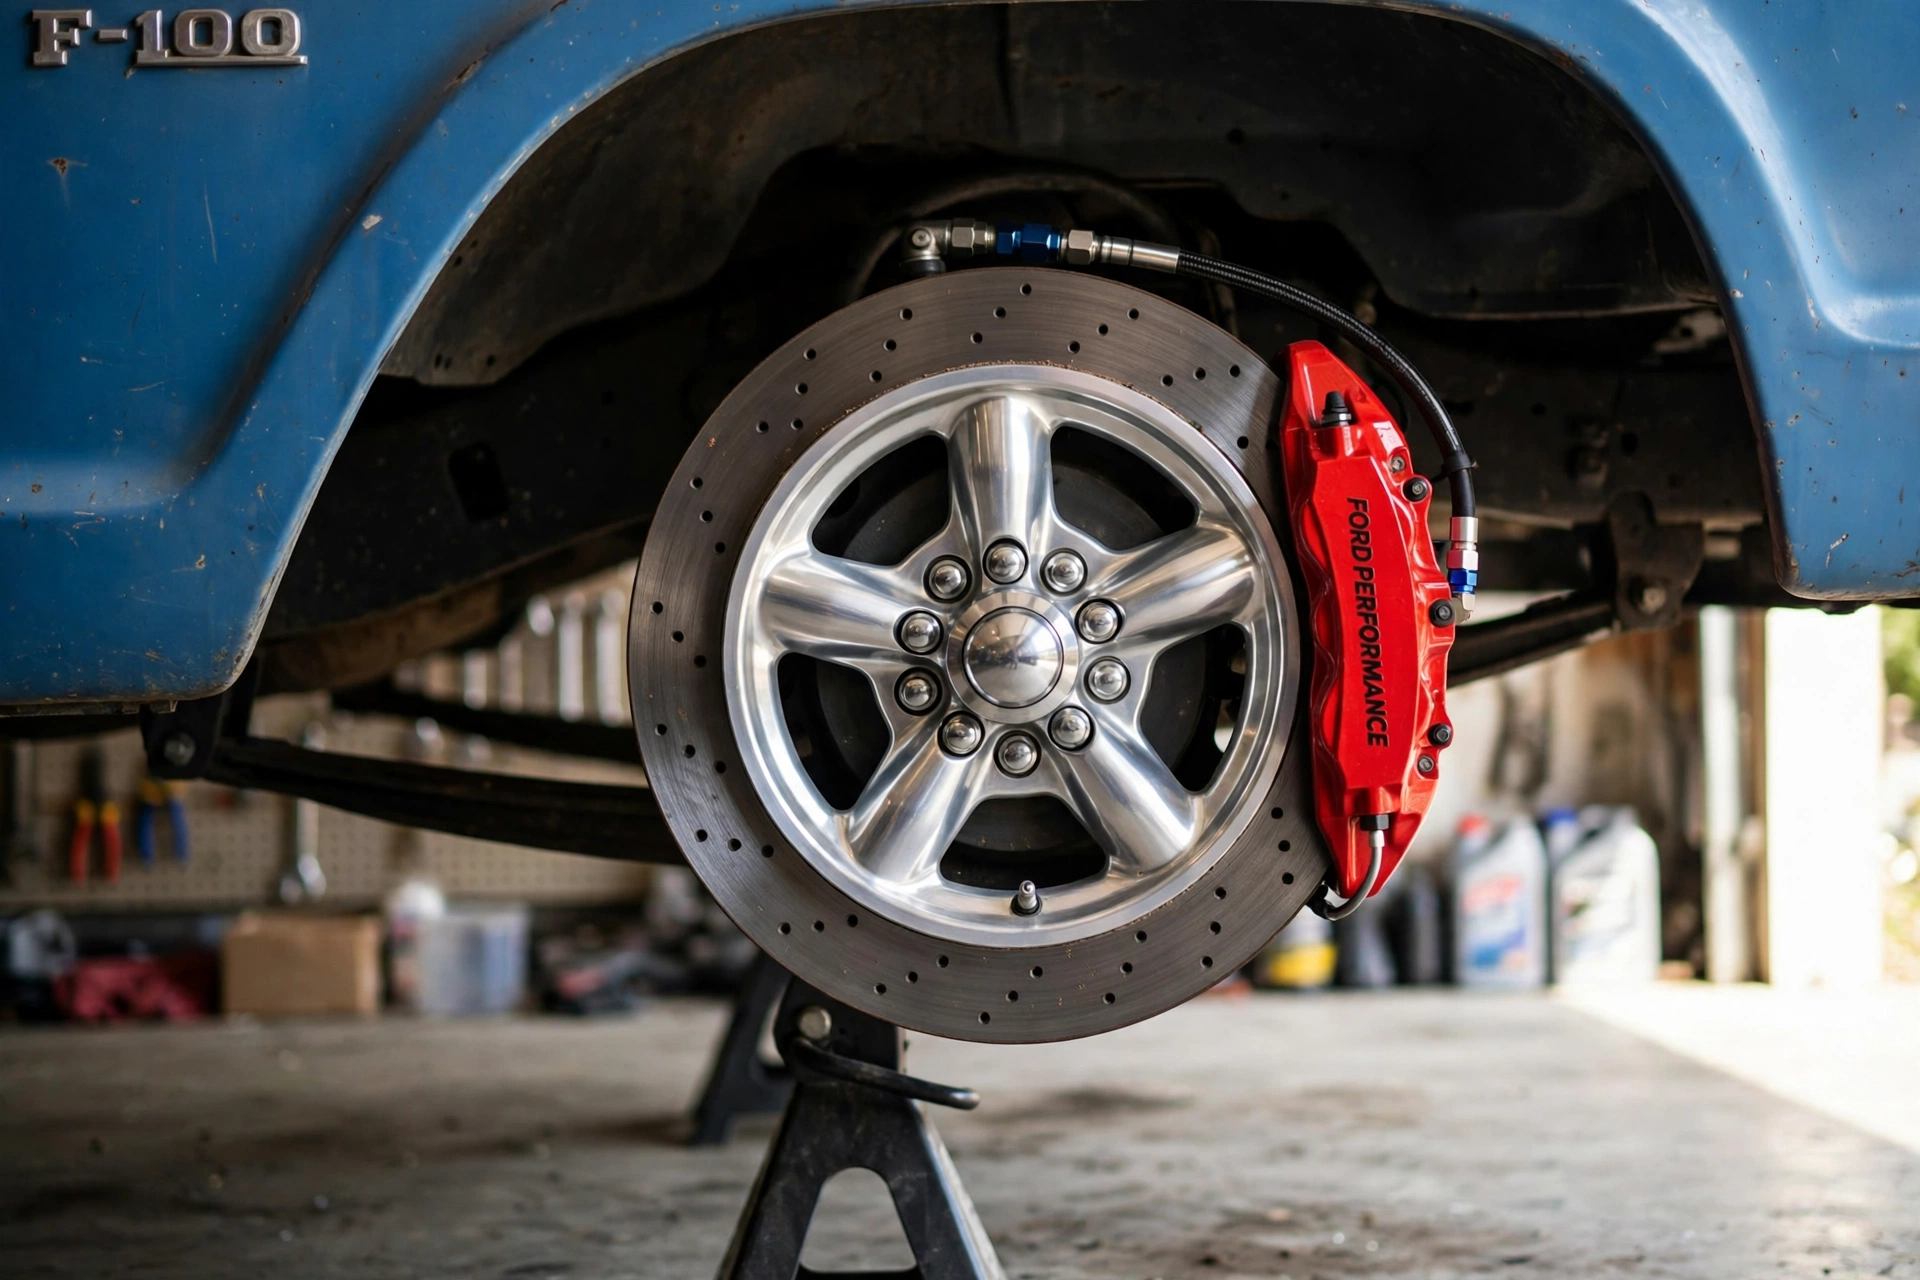
Cross-drilled disc brake rotor and red performance caliper behind a polished five-spoke wheel on a classic F-100 up on jack stands
Stopping power, upgraded

Disc Brake Conversion

Fits · All generations — the route changes by front end

Year check: most ’53–’72 trucks left the factory on front drums and stop like it. Dentsides got factory front discs — on those trucks this job is the big-brake upgrade, not the conversion. Beam trucks (’65–’79) have the famous junkyard route; straight-axle trucks take bracket kits.

Every other job on this page makes the truck faster or lower. This one makes it stop — shorter distances, no fade down a long grade, no pulling to one side when the drums get hot. A conversion is spindles (or brackets), rotors, calipers and pads up front — plus the part the cheap kits skip: a disc/drum master cylinder and a proportioning valve, because a drum master will not push calipers correctly. Do the hydraulics honestly and it’s one of the highest-value weekends in this whole list.

The junkyard classic: on Twin I-Beam trucks, ’73–’79 factory disc spindles swap onto the earlier beams — yard spindles and calipers plus new pads, hoses and a master cylinder (never yard wear-parts in a brake system) is the budget conversion F-100 owners have run for decades. Out back, an Explorer 8.8 swap brings rear discs with it — see Rear Ends.

🛑 Shorter stops · no fade💲 Ballpark — see the two ways below🔧 2–3/5 · a weekend job

Parts list — shop the build

  • Front disc conversion kit — spindles/brackets, rotors, calipers for your front end Shop → Affiliate slot
  • Disc/drum master cylinder + adjustable proportioning valve — the step the cheap kits skip Shop → Affiliate slot
  • Power brake booster — if your truck never had one Shop → Affiliate slot
  • Wilwood Forged Dynalite big-brake kit — the upgrade lane, $1,276–$1,665 by finish Shop → Affiliate slot
  • Brake hoses & hard line — new, always, on either route Shop → Affiliate slot
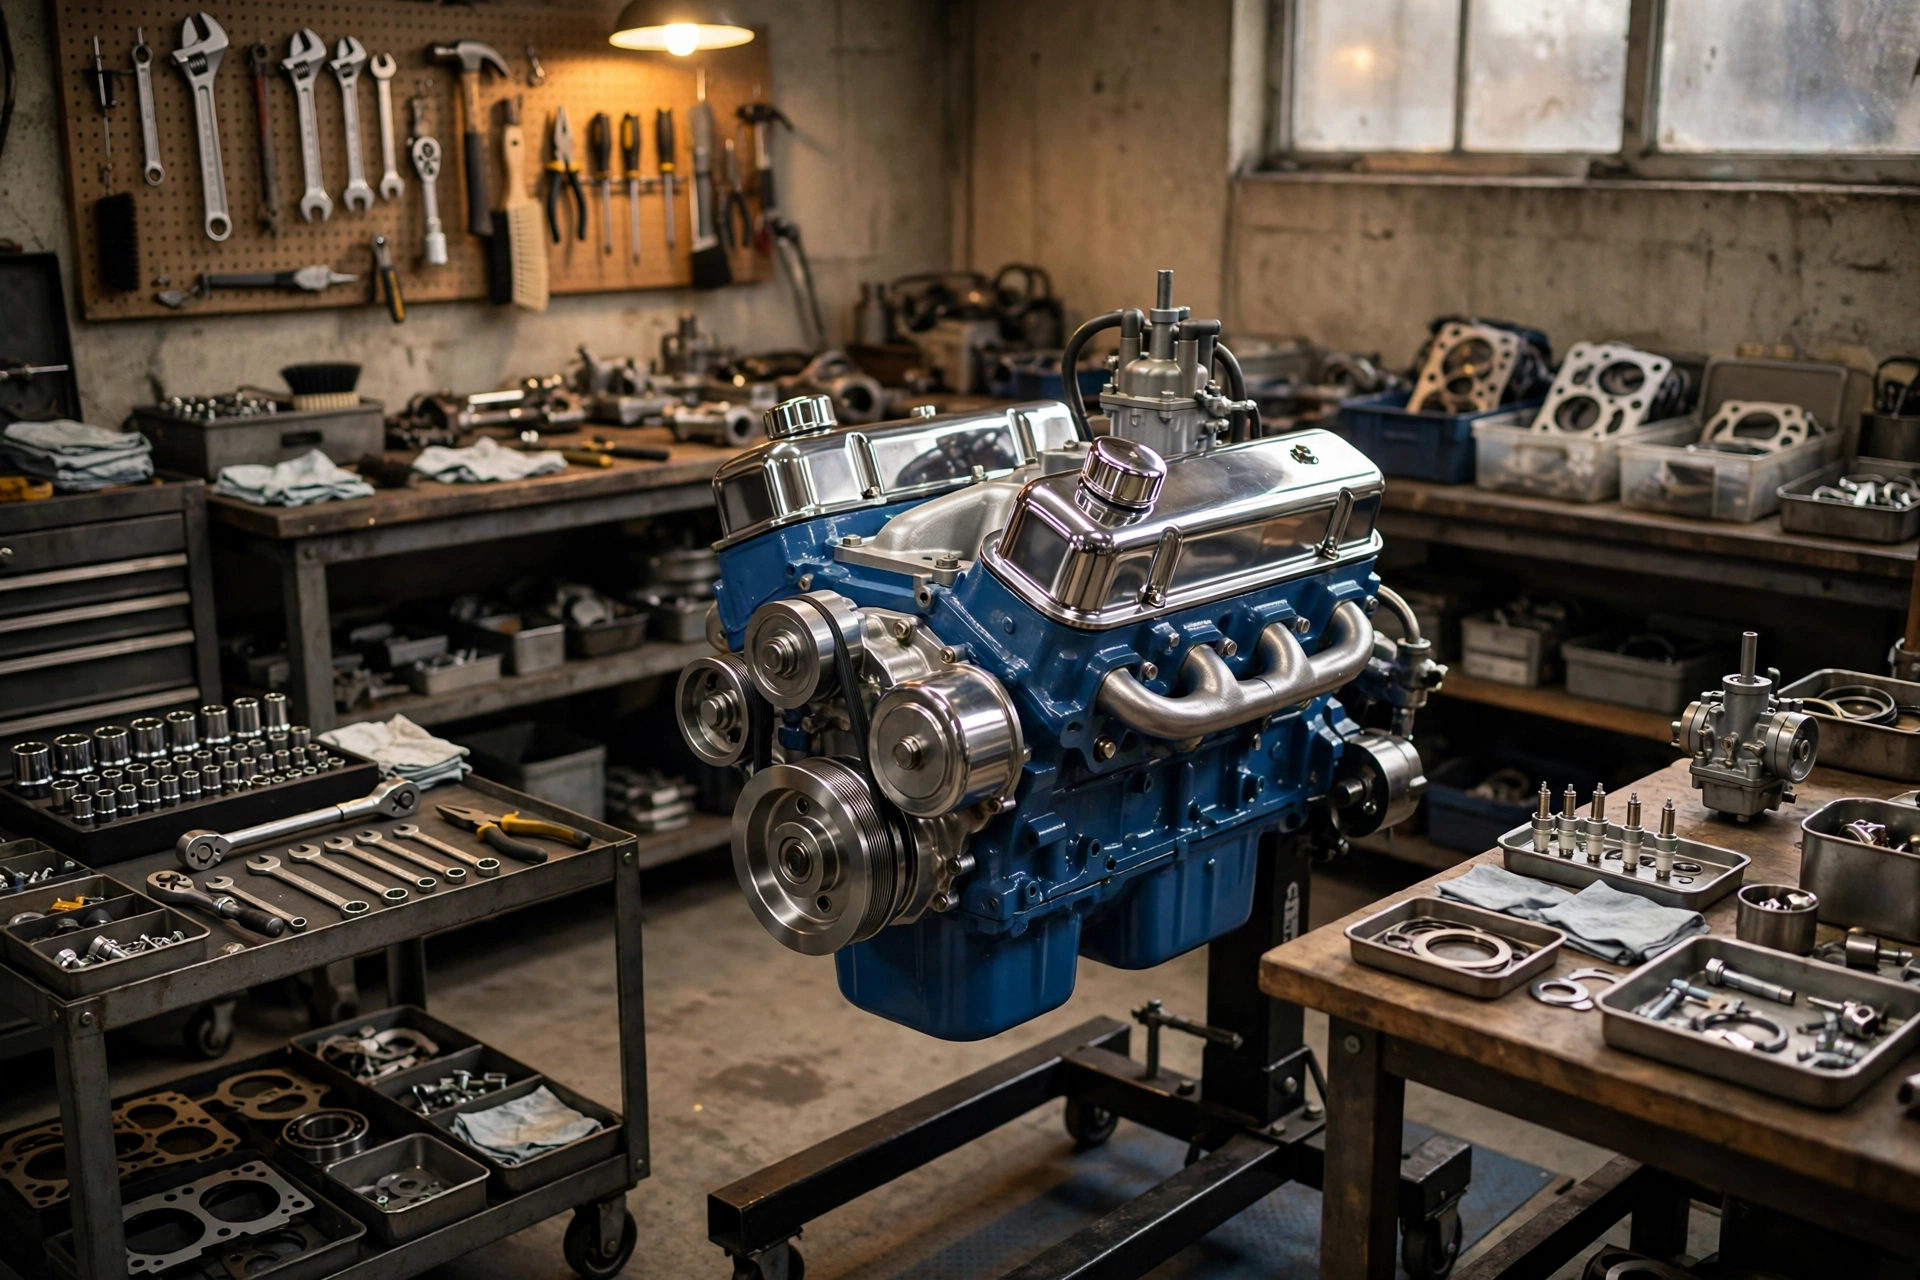
Rebuilt small-block Ford V8 engine on a stand in a garage
The other motor roads

More Motors — SBF, Big-Block & LS

Fits · All generations — what counts as a “swap” changes

Year check: on a ’65–’86 truck the small-block Ford is the home motor and the GT40P lane below is a refresh; on a ’53–’60 truck even the small-block is itself a swap (flathead/Y-block came first), so budget mounts and cooling accordingly. Godzilla fitment is tightest in the early, narrower bays.

Not every truck needs a Coyote — keeping the small-block Ford is what most actual bumpside owners do. The named budget build: a 1996–2001 Explorer/Mountaineer 5.0 (GT40 heads on ’96–early-’97, GT40P heads on late-’97–’01), good for ~205–215 hp stock and 260–320 with cam, intake and headers. A Sept 2026 Ford-Trucks thread prices the lane exactly: the whole GT40P long block runs ~$350 at a pick-your-part yard, against $2,500–$3,500 for an aluminum top-end kit. The must-warn items: the P heads’ revised spark-plug angle burns plug wires and needs P-specific headers or 289 Hi-Po manifolds. Whole build in the truck: ~$1,500–$4,000.

Rising, but halo for now — the 7.3 Godzilla: Ford Performance’s new turnkey bundle (M-9000-PM73BA) pairs the 430 hp / 485 lb-ft pushrod 7.3 with a 10R80 and control pack for $18,500, and Fat Fender lists Godzilla — and the 612 hp Megazilla — on its chassis menu. It’s narrower than a Coyote and torque-first, which suits a truck bay; but at $15,000–$25,000 realistic all-in with pricey Super Duty donors, it’s a watch-it trend, not the volume play. LS swaps are real and cheaper (one Ford-Trucks owner reports ~$6,000 total, “double that” for a Coyote) — and genuinely contested in Ford circles, with a resale penalty on Ford-specific marketplaces. We cover it honestly as the budget-power option. Our Project ’72 motor is a small-block on the stand right now — the secondary avenues, covered straight.

🐴 205–320 hp SBF · 430+ Godzilla💲 $1,500–$4,000 SBF · $15k–$25k Godzilla🔧 2–3/5 SBF · 4/5 Godzilla

Parts list — shop the build

  • GT40P long block — ’96–’01 Explorer/Mountaineer 5.0, ~$350–$400 at the yard Find them → Affiliate slot
  • Fel-Pro 9333 PT-1 head gaskets + ARP 154-3601 head bolts — the known-good P-head combo Shop → Affiliate slot
  • Ford Performance Godzilla 7.3 crate + 10R80 turnkey bundle — $18,500 Shop → Affiliate slot
  • Master rebuild kit (302 / 351W) Shop → Affiliate slot
  • EFI conversion kit (carb-to-EFI) Shop → Affiliate slot
  • Big-block / LS swap mounts & essentials Shop → Affiliate slot
Mustang independent rear suspension with coilovers and big disc brakes installed under a bumpside F-100 on a lift
The fastest-rising swap

Rear Ends & Mustang IRS

Fits · Width-dependent — see the year check

Year check: rear swaps live and die on housing width. The Explorer 8.8 (59½″ wide) suits the narrower ’53–’79 trucks best and its 5×4.5″ pattern matches a Crown Vic front; the S550 IRS bolt-in kit covers 1961–78 (Slickside through Dentside) — Effie/Fridge frames and Bullnose trucks aren’t in that kit’s range.

The rear end is where 2026 got interesting. Four live lanes: keep and build the 9-inch your truck already has; the Explorer 8.8 budget swap; a bolt-in torque-arm / 4-link on the solid axle; and the riser — a complete S550/S650 Mustang independent rear under a bumpside.

The S550 IRS story: Range Industries’ bolt-in mounting kit ($795) hangs a 2015–23 Mustang rear subframe (“Super 8.8” center, LSD, big discs) under 1961–78 F-100s using the original leaf-spring bracket holes — no bed-floor cut — and Range confirmed in June 2025 that the 2024+ S650 bolts in exactly the same way. First-wave verdicts are glowing: a Sept 2026 Ford-Trucks build (Crown Vic front, Coyote, S550 rear) reports the truck went from “good handling truck” to “feeling like a sports car.” Needs 17″+ wheels to clear the brakes, and offset matters on the wider track.

The budget classic: a 1995–2001 Explorer 8.8 — 31-spline axles, discs, 59½″ wide, and a 5×4.5″ bolt pattern that matches the Crown Vic front, which is exactly why the CV-front / Explorer-rear pairing is the classic budget combo. Factory LSD is common in 3.73 (door code D4). And one correction to a common assumption: there’s no real standalone “Crown Vic rear” lane — Panther 8.8s mostly arrive as part of full frame swaps, not as a bumpside rear-end swap.

💲 8.8: $600–$1,200 in · IRS: ~$2,000–$3,500 in · built 9″: $3,000–$5,500🔧 8.8: 3–4/5 · IRS: 3/5 bolt-in

Parts list — shop the build

Generation-specific lines: the Range IRS kit fits 1961–78 trucks; the QA1 torque-arm is a ’65–’79 part; the Explorer 8.8 suits ’53–’79 widths. The 9-inch parts fit any generation that carries one.

  • Range Industries bolt-in S550 IRS mounting kit — $795 Shop → Affiliate slot
  • S550 Mustang rear subframe, complete — used, $500–$1,500 Find it → Affiliate slot
  • Explorer 8.8 rear axle — ’95–’01, 3.73 LSD (door code D4) Find it → Affiliate slot
  • Currie 31-spline 9″ third member, TwinTrac LSD — $1,400 (CJ Pony Parts) Shop → Affiliate slot
  • QA1 rear torque-arm system — bolt-in, no welding, $3,035.95 (verified at qa1.net) Shop → Affiliate slot
  • C-notch kit — required past ~5–6″ of drop, $150–$400 Shop → Affiliate slot
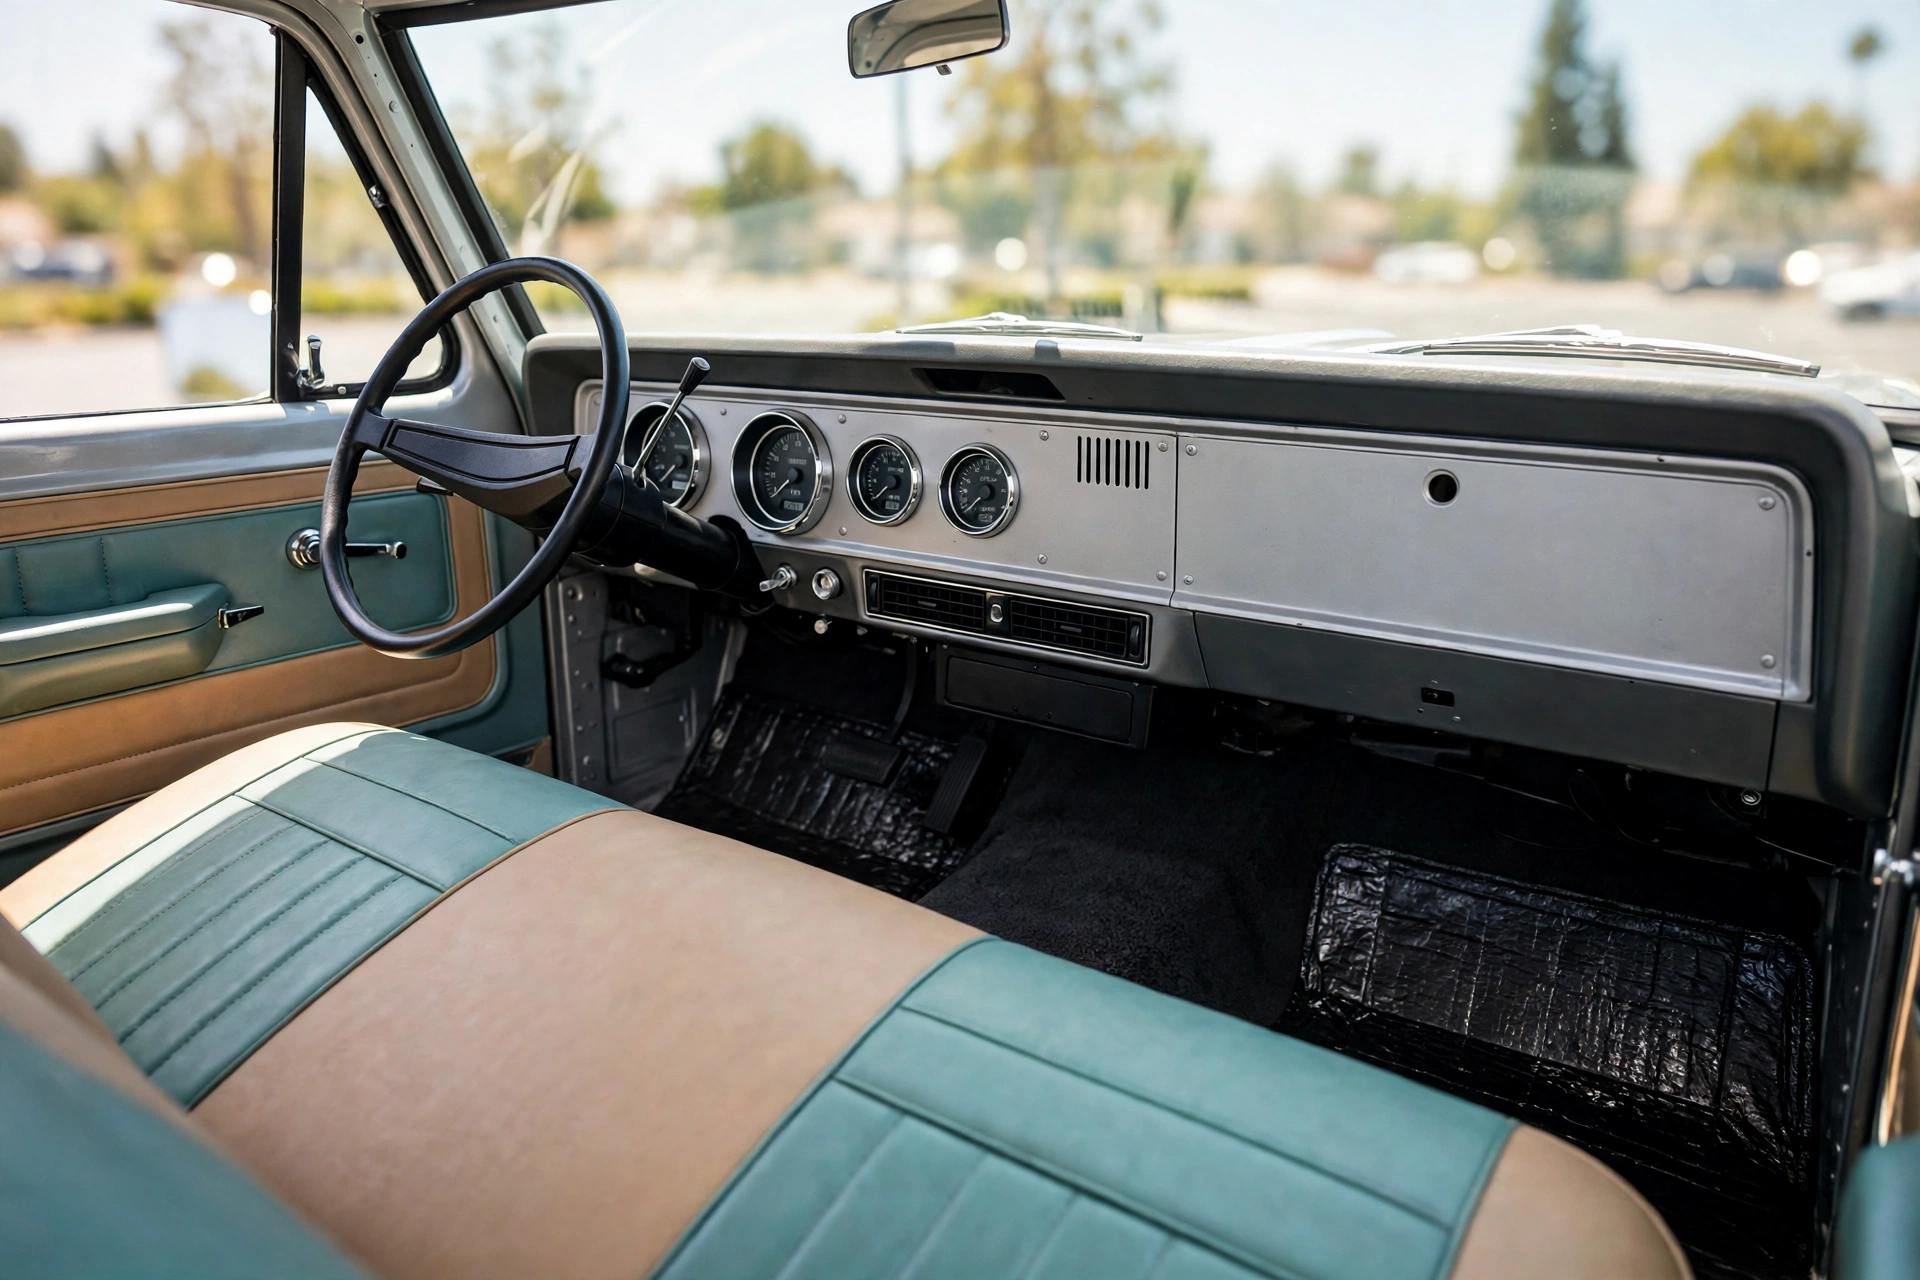
Restored bumpside F-100 interior with stock-look modern gauges, under-dash A/C vents and a fresh two-tone bench seat
The second purchase

The Comfort Stack & EFI

Fits · All generations — kits are cut per generation

Year check: the stack is universal, the part numbers aren’t. Gauge systems, A/C kits and carpet sets are each cut for a specific year range — the prices below are the ’67–’72 Bumpside versions; your generation’s kit exists, at its own price.

Lower ticket, broader audience than any swap — and the natural second purchase after a truck is running. Finished builds almost always do the same bundle together: modern gauges, real A/C, a quiet cab, and EFI that starts like a new truck.

Gauges: Dakota Digital is near-universal in finished bumpsides — VHX $973.61, HDX $1,543.75, RTX $1,676.75–$1,727.05 (NPD pricing); RTX is the stock-look one in most featured builds. A/C: Vintage Air’s SureFit kit for ’67–’72 lists $2,472 at NPD; Restomod Air is the rival name on high-end builds. EFI: Holley’s Sniper 2 is the current headline for carbureted motors — and the famous bargain-EFI headline price never included the fuel system. Budget the tank, in-tank pump, regulator and lines: $1,400–$2,200 all-in. Foundation: sound deadening + pre-cut carpet is the fastest-growing DIY interior work there is — Fat Fender’s 2026 five-upgrades list leads with exactly that stack.

💲 $500 deadening + carpet → $3,000–$6,000 full interior kit🔧 Gauges 2/5 · A/C 3/5 · EFI 2–3/5

Parts list — shop the build

Priced for 1967–72 Bumpside. Dakota Digital, Vintage Air and carpet kits are all sold by year range — order your generation’s part number.

  • Dakota Digital RTX gauge system — stock-look, ~$1,677–$1,727 Shop → Affiliate slot
  • Vintage Air SureFit A/C kit, ’67–’72 F-100 — $2,472 Shop → Affiliate slot
  • Holley Sniper 2 EFI + in-tank fuel system — $1,400–$2,200 all-in Shop → Affiliate slot
  • Sound deadening + pre-cut carpet kit Shop → Affiliate slot
Same Truck · Three Roads

Choose Your Build Path

An avenue is a single job. A path is the whole truck, sequenced so you never buy a part twice. Tap a path to see its order of operations.


The Blog / Guide Index

Guides & Shop Notes

Step-by-steps, donor cheat sheets, and fitment notes — written from a real build, with the mistakes left in so you don’t pay for them twice. Every guide closes with its full parts list, and every card carries its fits label — the generations it actually applies to.


Generation Build Guides — The Full Library

One guide per generation — because a ’55 and a ’75 are different trucks wearing the same badge. Full text, tables, budgets, and a parts list for each, fact-checked in October 2026. Pick your years:

Generation Guide1953–1956Effie

The Effie is a classic hot-rod platform: straight axle up front, leaf springs, and — depending on the year — flathead, six, or Y-block power. This is the full build guide for it: suspension routes, engine options, an honest budget, the build order, and the parts list.

Read the guide →
Generation Guide1957–1960Fridge

The Fridge brought the wide Styleside body and, for 1959, Ford’s first factory 4×4 pickup. The street-truck build stays traditional — dropped axle or a purpose-built IFS — and this guide covers both, plus engines (including the 1958–60 352 FE), budget, and parts.

Read the guide →
Generation Guide1961–1966Slickside

The Slickside is two trucks in one generation: 1961–64 on the early front suspension, 1965–66 on Twin I-Beam — with the integrated “unibody” Styleside in the early years. Get that split right and everything else in this guide falls into place.

Read the guide →
Generation Guide1967–1972Bumpside

The flagship generation — and this site’s home turf. Drop beams, Crown Vic swaps, axle flips, and every motor from a Windsor to a Coyote, with the prices and cautions checked line by line (including two corrections to earlier drafts, noted where they land).

Read the guide →
Generation Guide1973–1979Dentside

The Dentside keeps the Twin I-Beam, gains the F-150 beside it in 1975, and has the deepest donor ecosystem of the classic generations. Drop beams, flips, Crown Vic swaps, and the one engine-family warning that saves real money — all in here.

Read the guide →
Generation Guide1980–1983Bullnose

The last of the F-100s. A newer chassis, emissions-era powertrains, and one fitment trap the earlier trucks don’t have — bolt patterns vary in these years, so this guide tells you to confirm yours instead of trusting a blanket claim.

Read the guide →
The Build Journal

Project ’72 — Our Truck, In Public

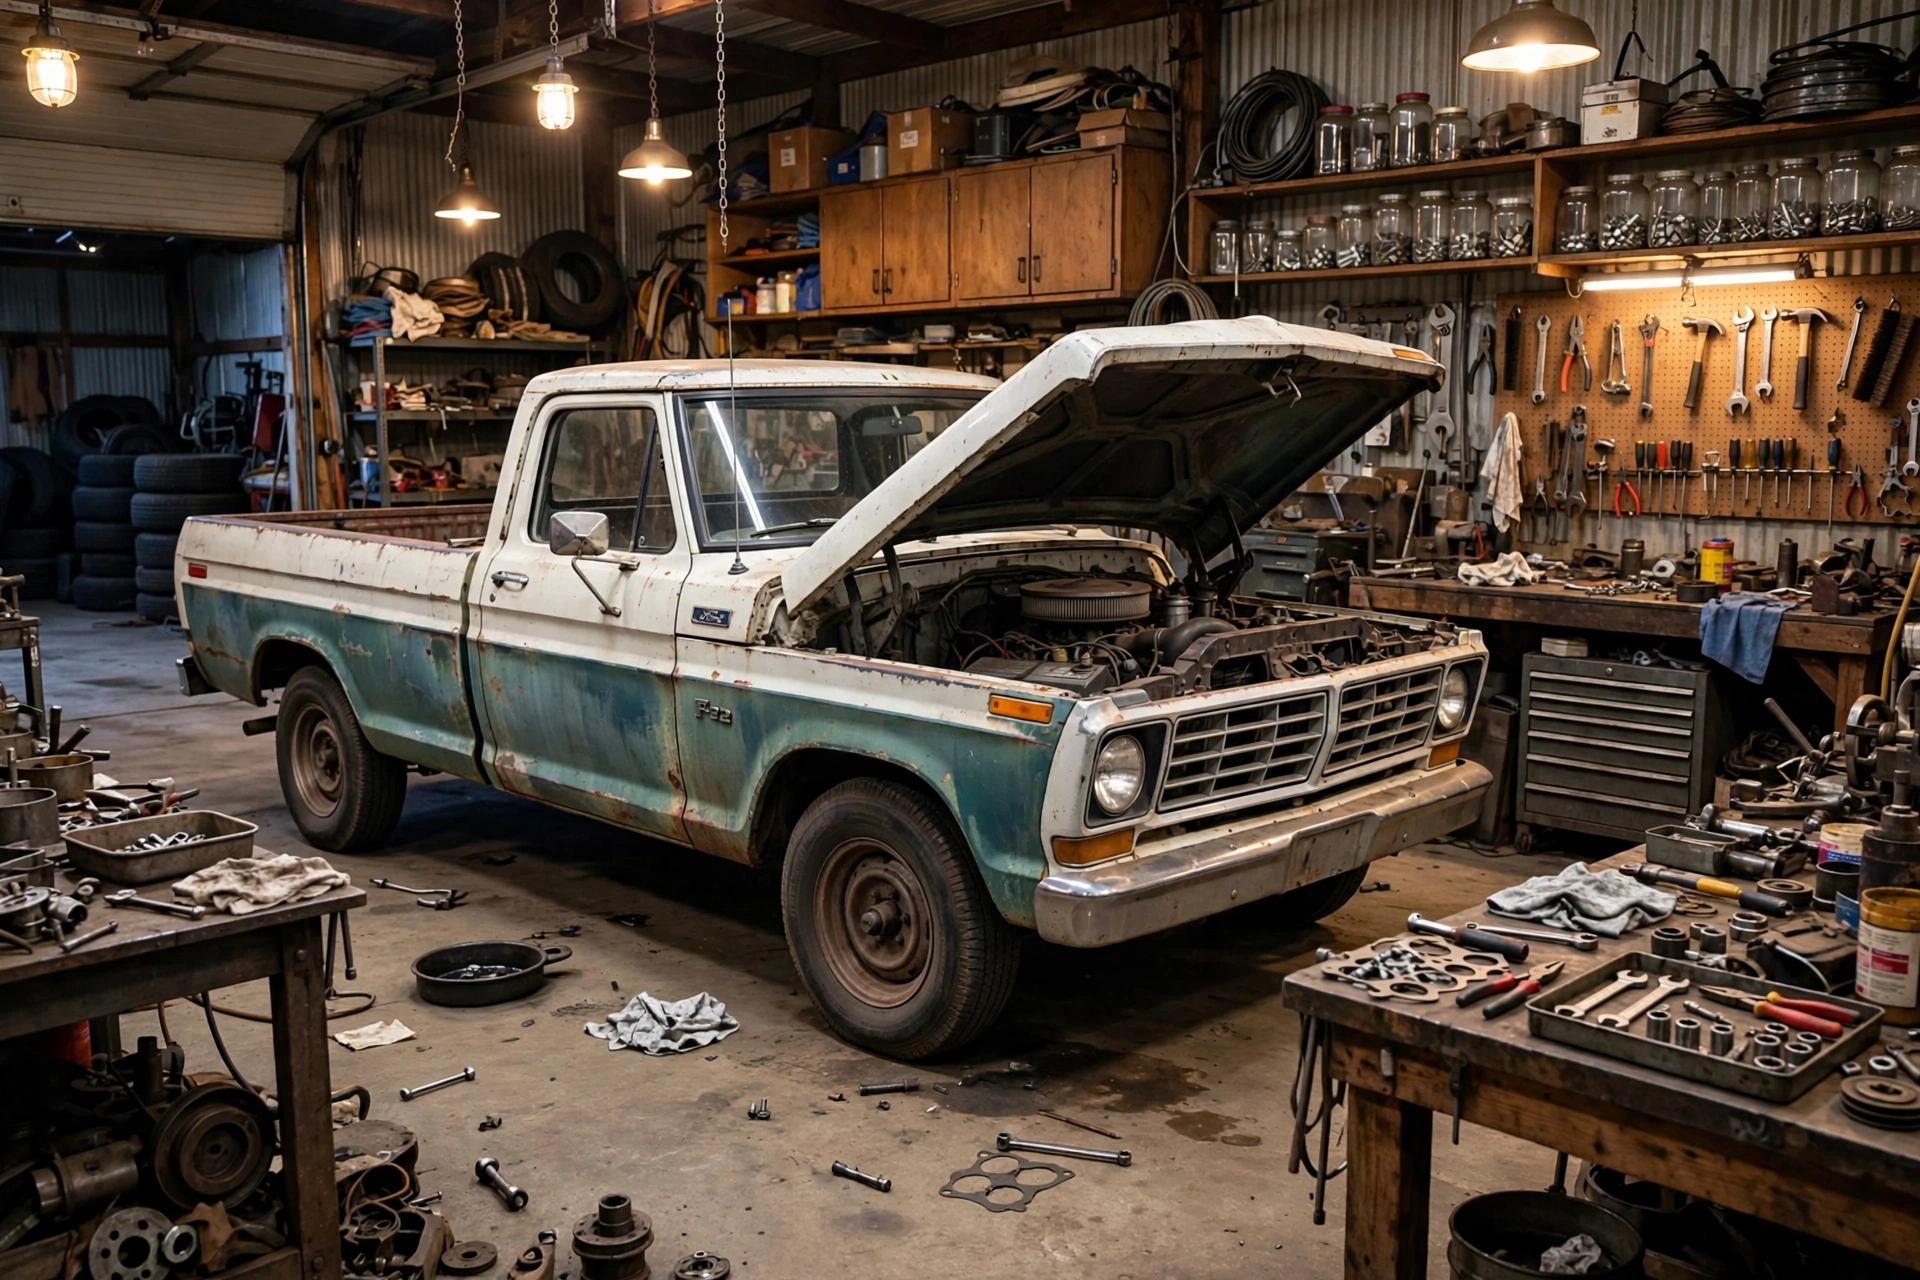
No shop truck on a lift with a film crew. A real 1972 F-100, a mechanic friend, a junkyard Crown Vic, and an engine rebuild happening on nights and weekends. This journal is the proof behind every guide above.


Patina F-100 project truck in the garage during its restomod build

Where it stands right now

Done · Oct 2026Crown Vic front end — pulled

The complete front suspension cradle came out of a junkyard donor and is home on stands, getting cleaned, inspected, and mocked up against the ’72 frame. Full pull-day checklist is in the guides.

Underway nowEngine rebuild — on the stand

The small-block is torn down and the rebuild is underway. Machine-shop notes, clearances, and every part that goes back in get logged here as it happens.

The huntGT40P heads — still searching

Looking for a clean ’98–’01 Explorer / Mountaineer 5.0 donor for GT40P heads — the best cheap airflow a small-block Ford ever got. Found a set? You know where the yard is.

Next upMock-up, stance, first fire

Cradle mock-up and ride-height math, then wheels, then first fire. The goal is the truck in the photo up top: turquoise, low, hood up, two-lane at golden hour.

Read the journal guides

Watch The Builds

Tennessee Two Lane on YouTube

The site is the manual — the channel is the movie. Pull days, rebuild nights, and the ’72 coming together, plus the wider garage life around it. Subscribe and build along.

▶ Watch @Nashvillebeach on YouTube
How the parts links will work

Guides here are free. When you buy through a parts link on this site, the retailer pays a small commission — you pay the same price. That’s what keeps the wrenches turning. Real affiliate links replace the marked slots as each program approves the site.

The Parts Network We’re Building

The goal: an affiliate source for essentially every part a build needs — new, used, and donor.

Amazon AssociatesTools, consumables, broadest net
eBay Partner NetworkDonor & used parts — Crown Vic, GT40P, NOS
CJ AffiliateAuto-parts retailers under one account
Summit · Speedway · JegsPerformance & swap hardware
LMC Truck · Dennis CarpenterF-100-specific sheet metal & trim